We also have a two-way integration with Autotask which means Customer Thermometer survey responses can be written back directly onto the Autotask ticket.
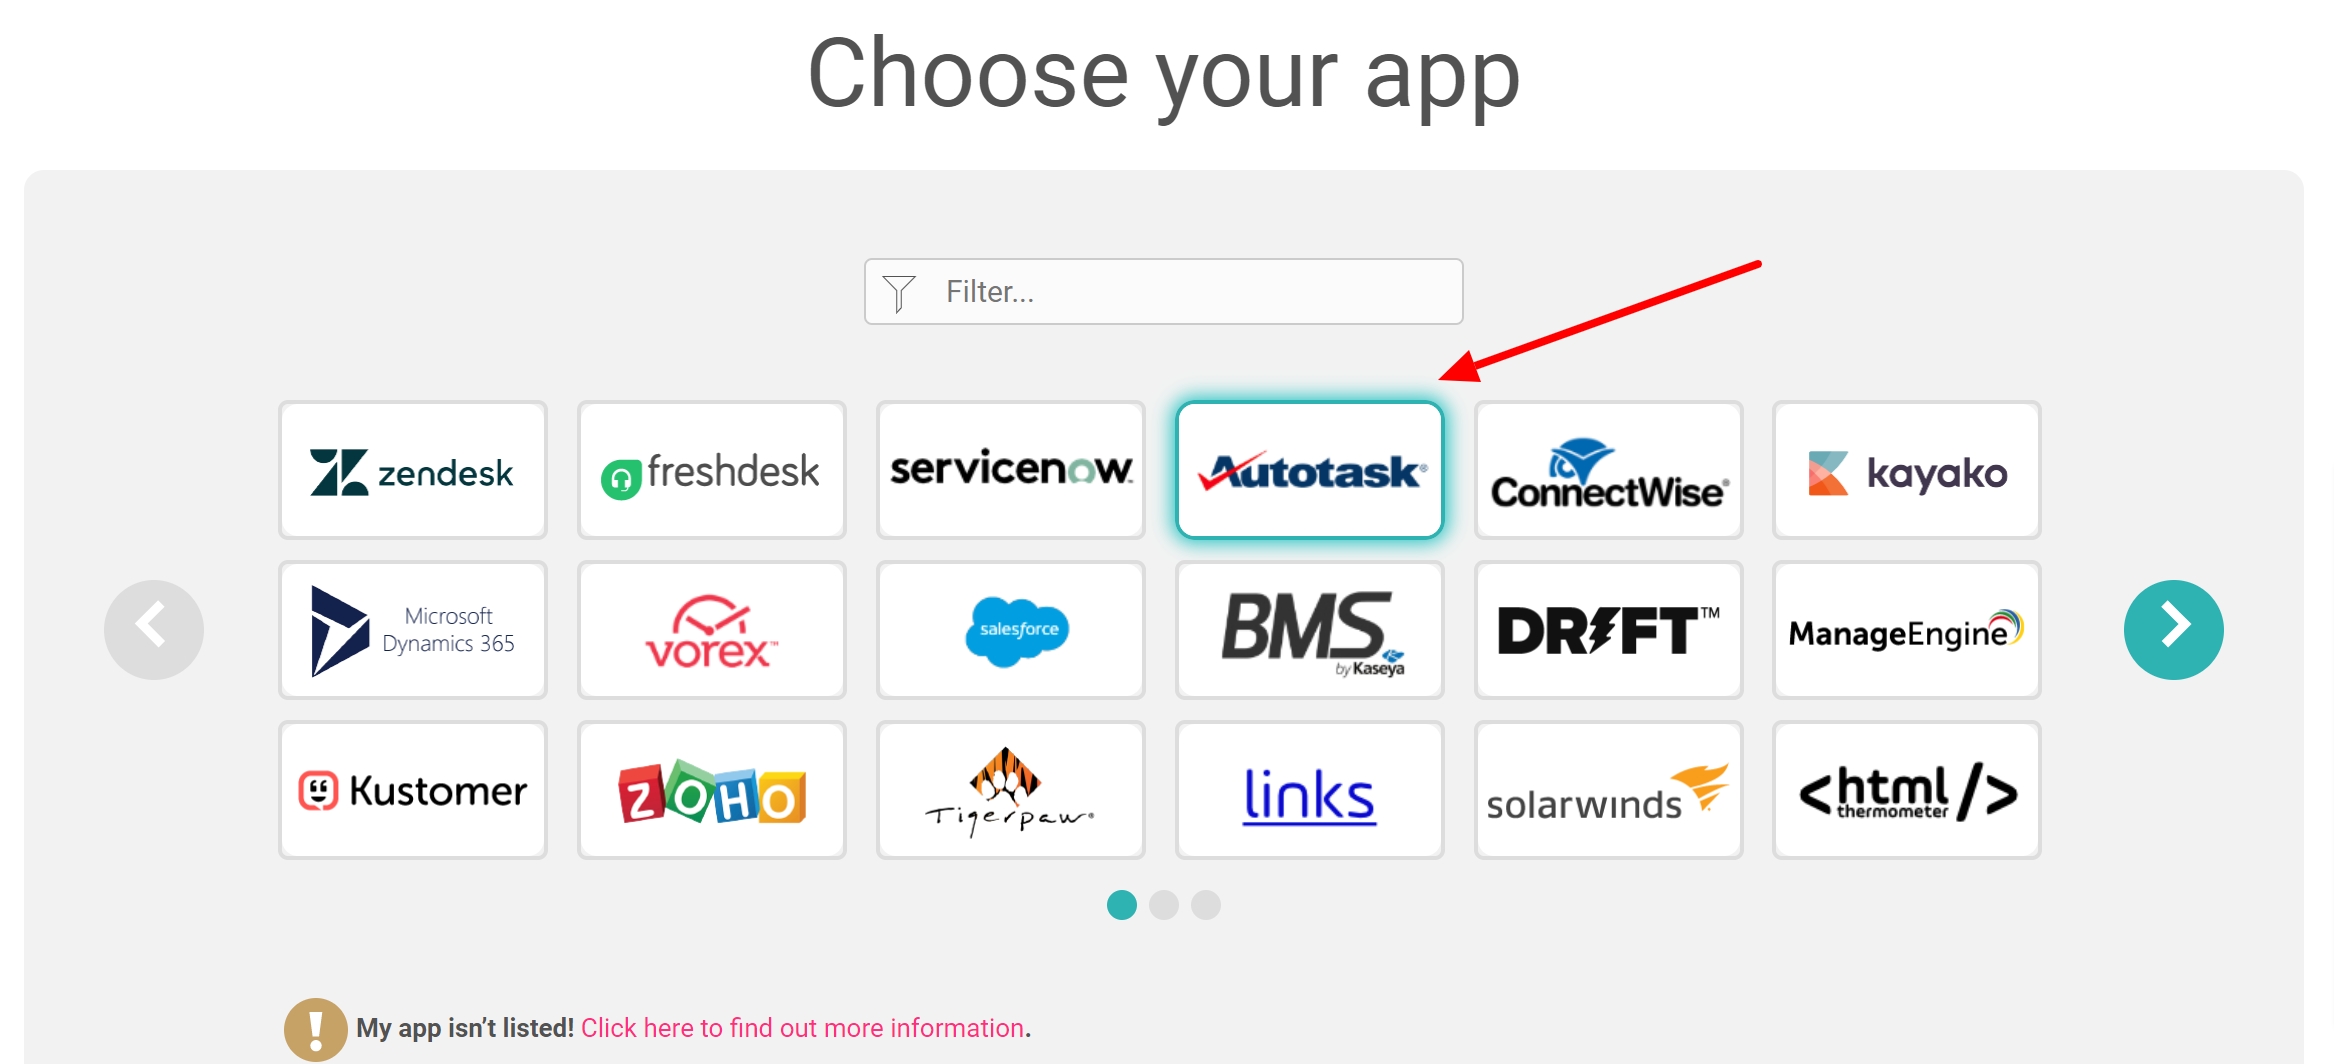
Create your Autotask Thermometer
Once logged in to Customer Thermometer head to Thermometers > Add new Thermometer > Helpdesk > Select Autotask
This will then open up your Thermometer Builder where you can create your survey and thank you pages.
The Question
This section of the builder is where you can choose the design of your survey including naming your Thermometer, adding your question and selecting your survey icons or uploading your own bespoke icons. The below video will demo all the customization which can be achieved in this section.
Connect your survey
In order for identifiable data about your recipients and senders to display within your reporting area, you first need to capture it. This would be done at the point that the email is sent, by including merge fields/variables from Autotask within the Thermometer code.
The most common Autotask variables are shown below for you, however, you can add more if you wish.
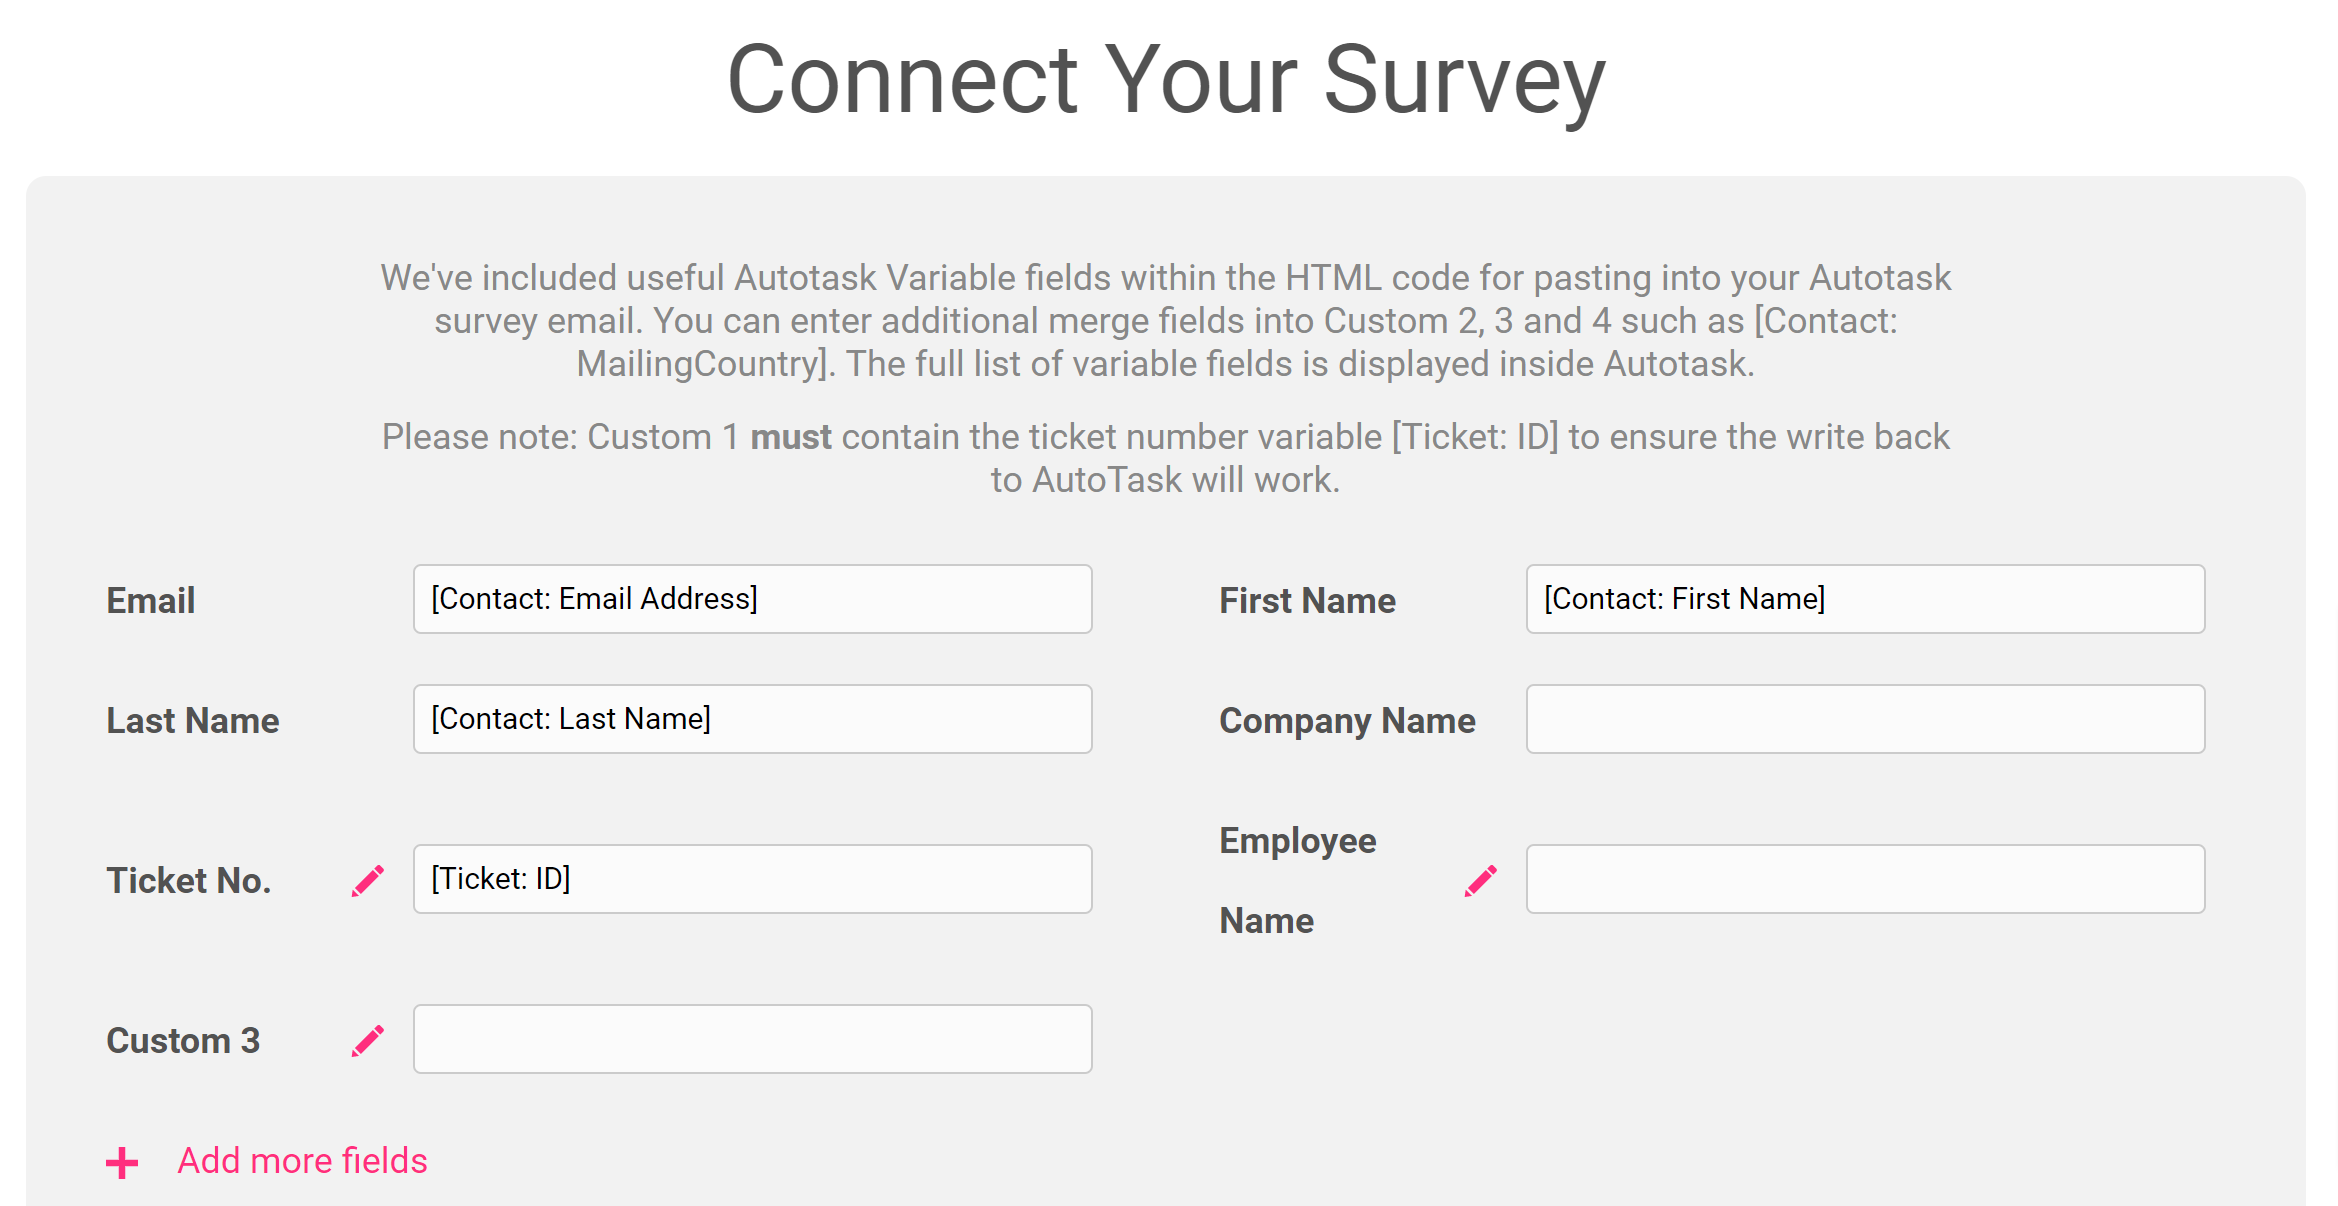
These variables will capture the corresponding pieces of identifiable data from Autotask and present them alongside the recipient's feedback rating within your reporting.
Response options
In your Connect your survey area, you have additional response options. Here you can choose whether to enable a lockout and set your email alert notifications.
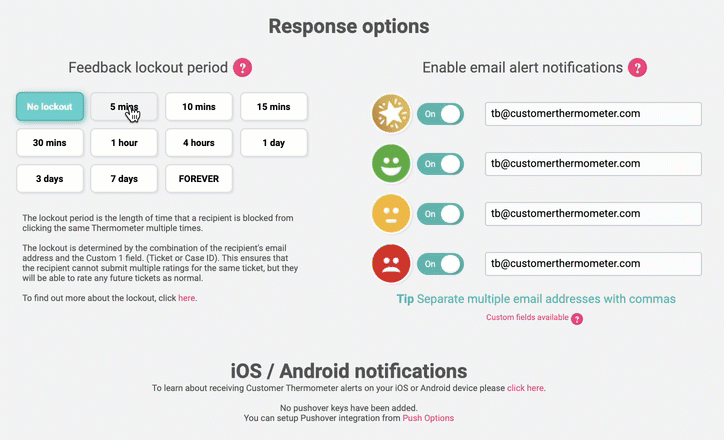
Separate multiple email addresses with commas.
Setting up your Autotask writeback
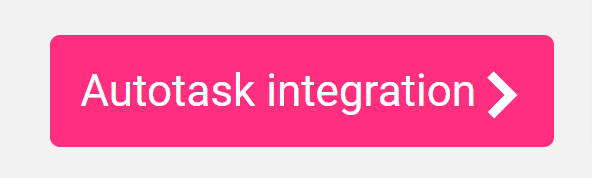
Select the Autotask integration button at the bottom of the Connect your Survey page.
This will take you to your writeback connection page. Please fill in the necessary details such as your API only user credentials. If you are stuck about how to create an API only user within Autotask click here.
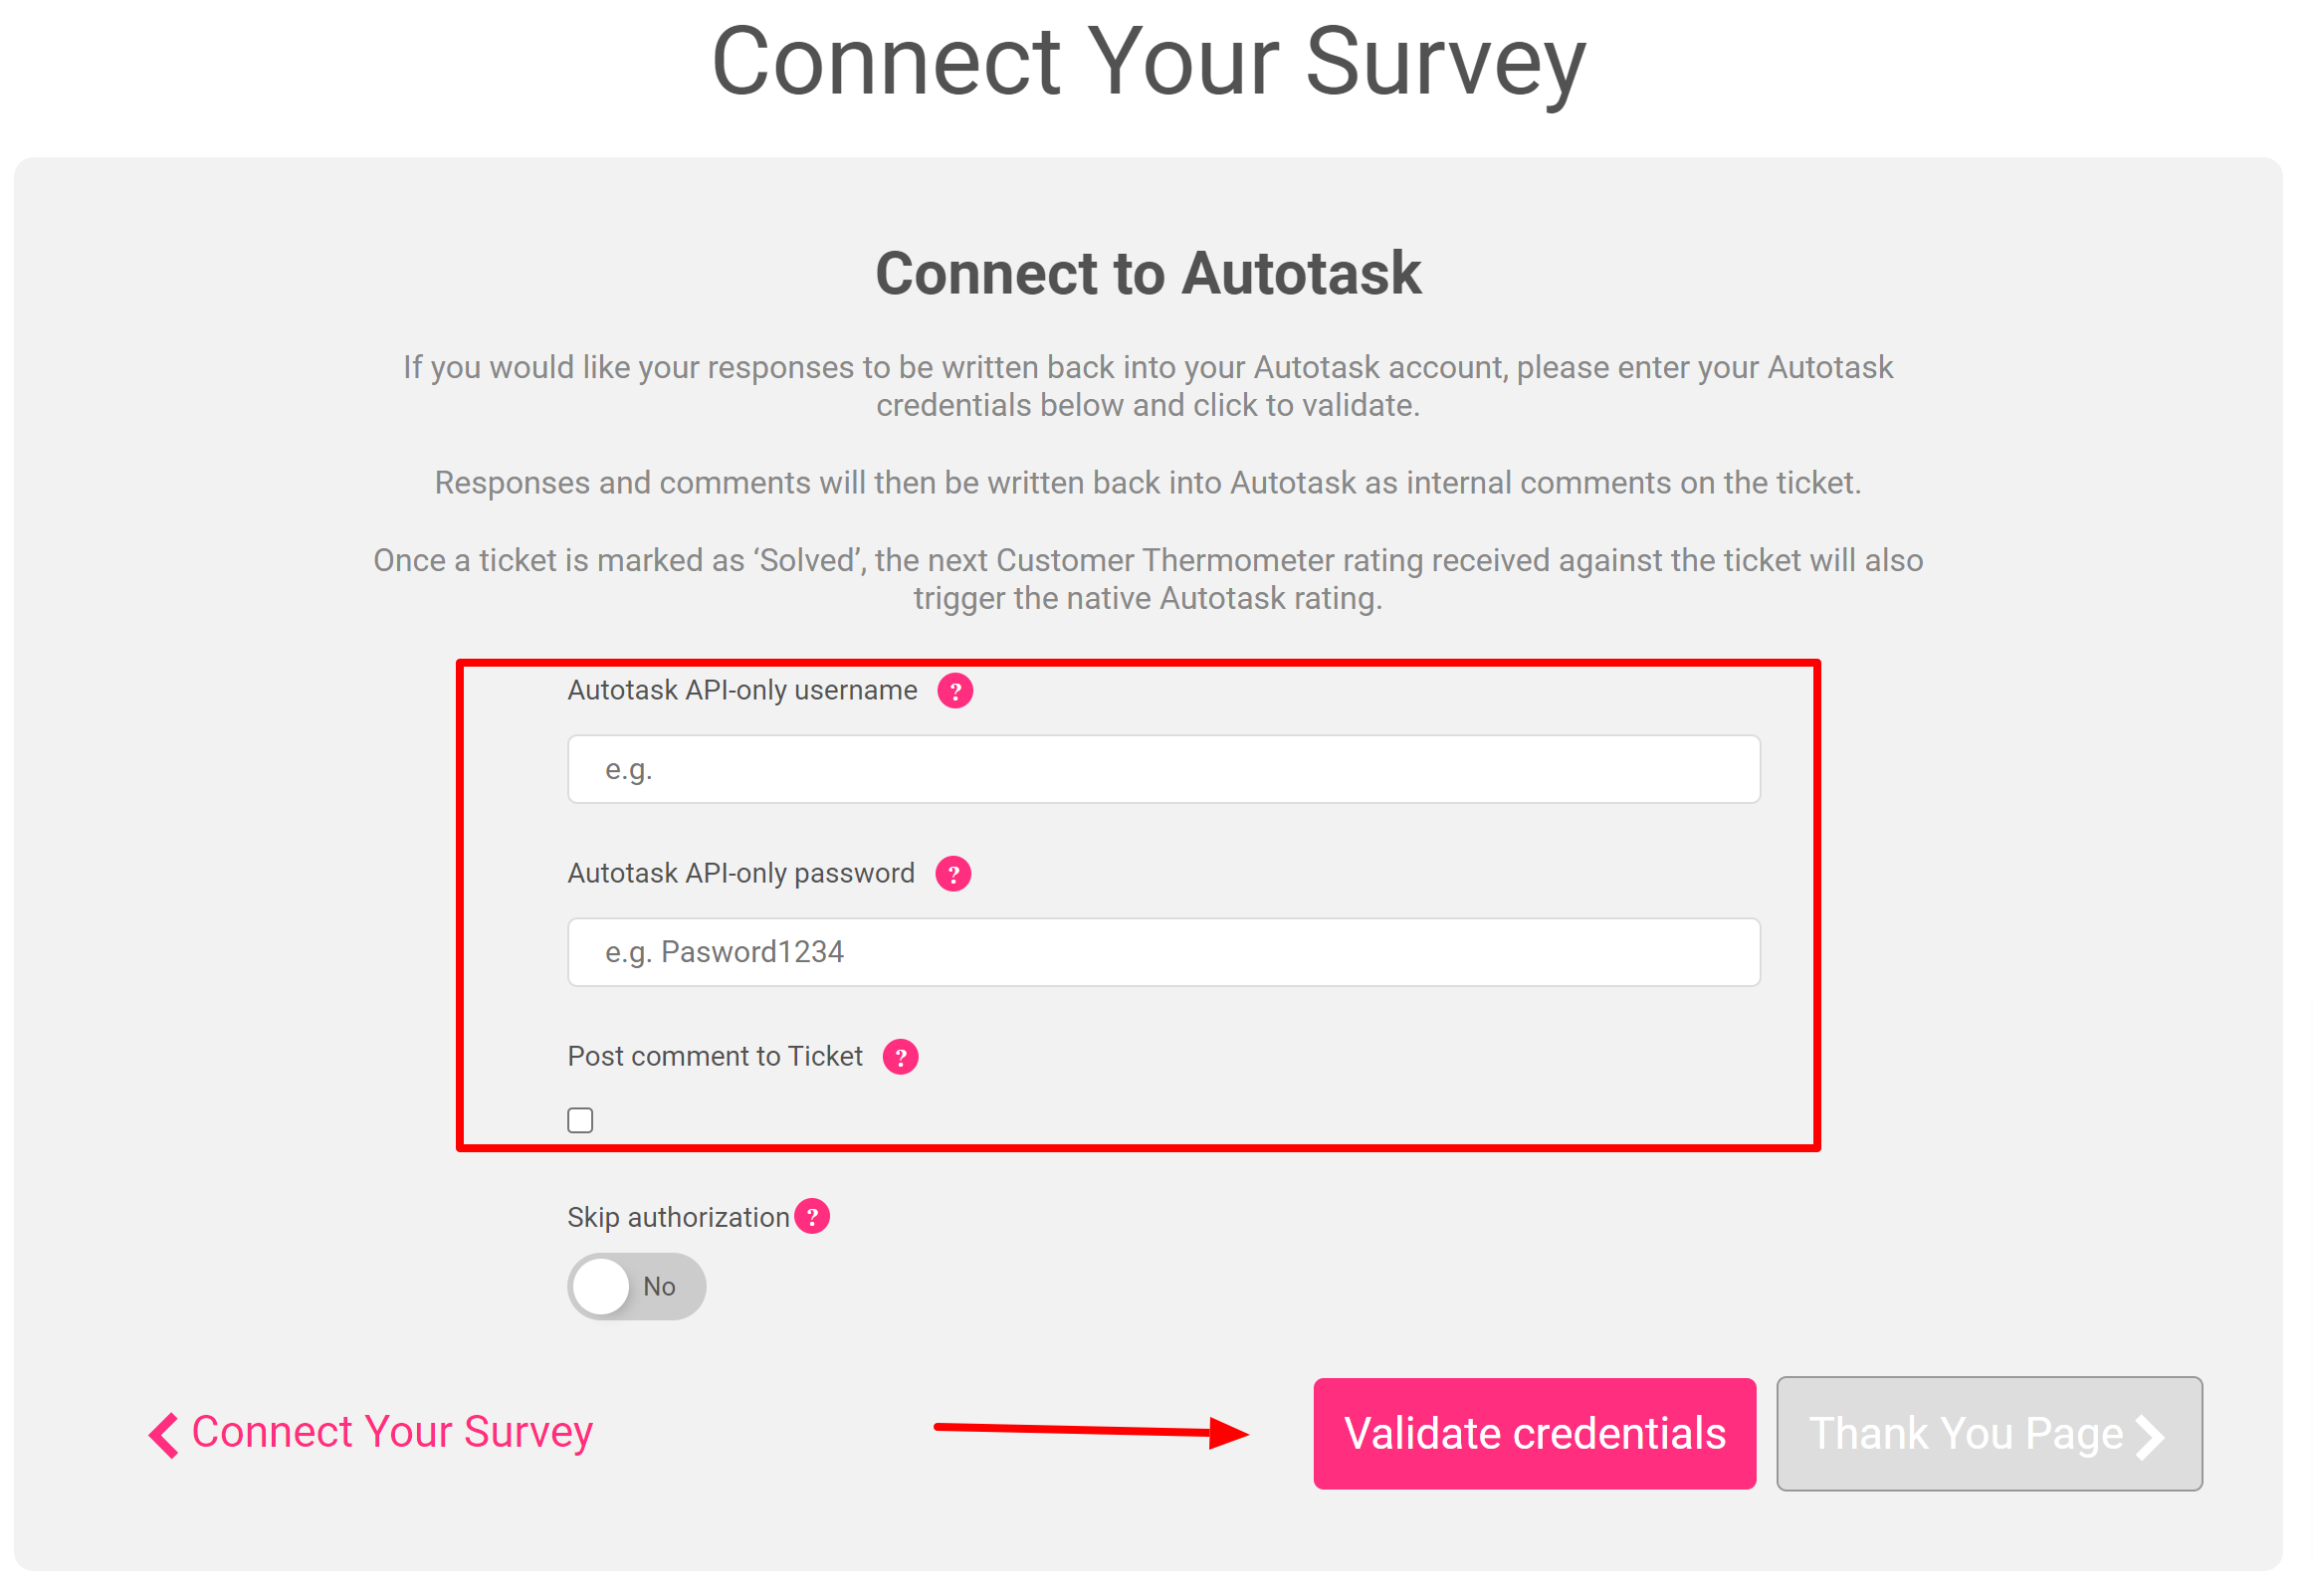
Then once added click 'Validate credentials'. Once validated please head to the second part of the set-up here.
Thank you page
It’s time to get those Thank you pages looking beautiful!
See below for a step by step walkthrough:
Embedding your survey into Autotask
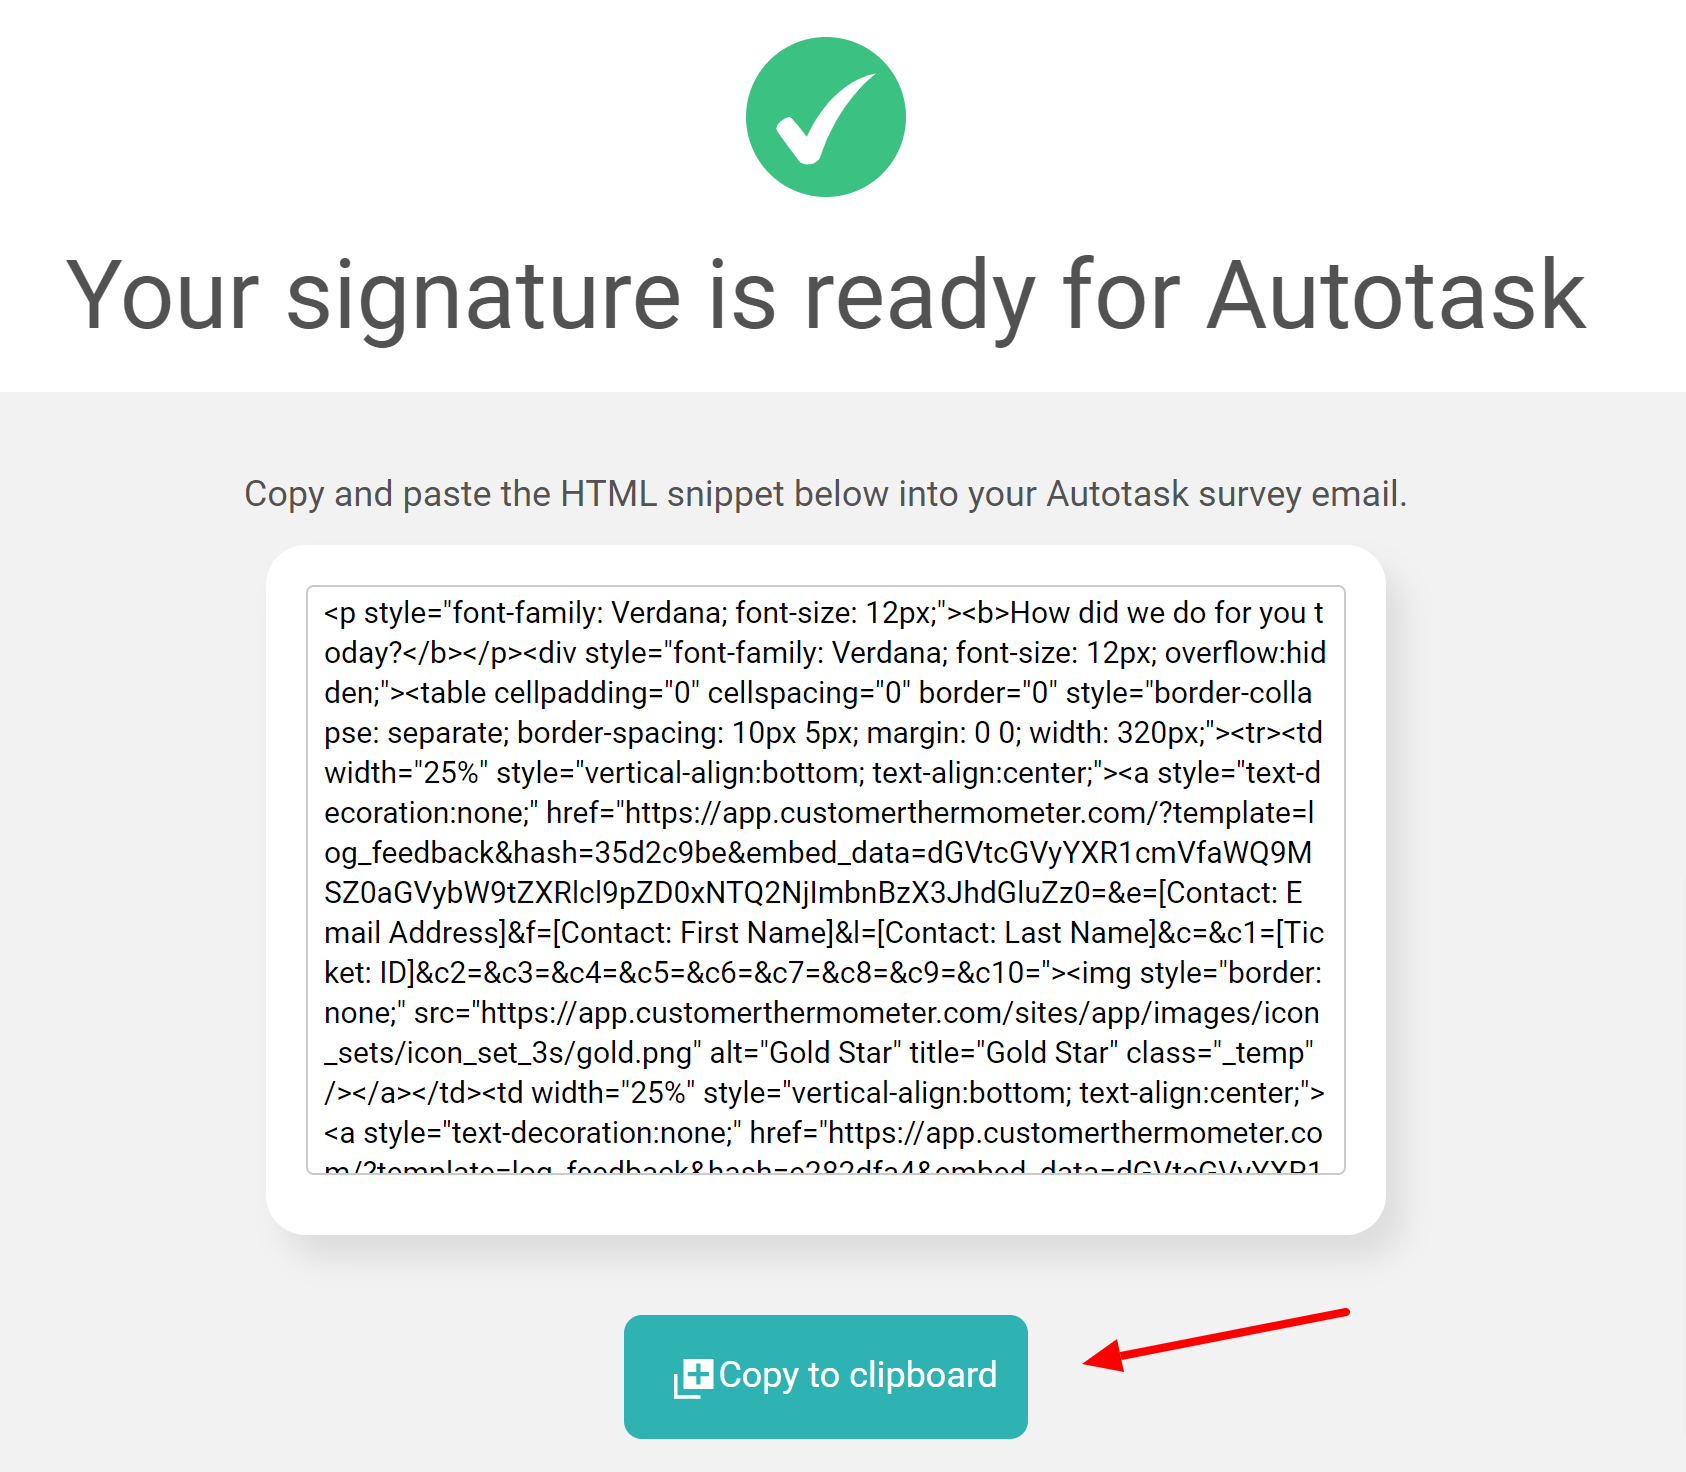
Once you've finished designing your Thermometer, the 'Give me my Thermometer' section will provide you with your finished survey to embed into Autotask. Click the 'Copy to clipboard' button to copy your survey HTML to embed into Autotask.
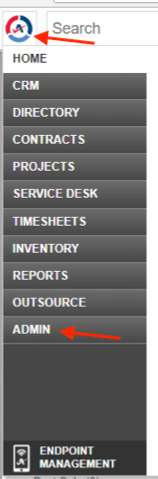
Admin rights are required for this setup.
Within Autotask, hover over the Autotask icon and select ‘Admin‘:
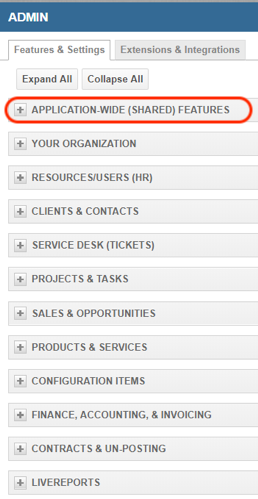
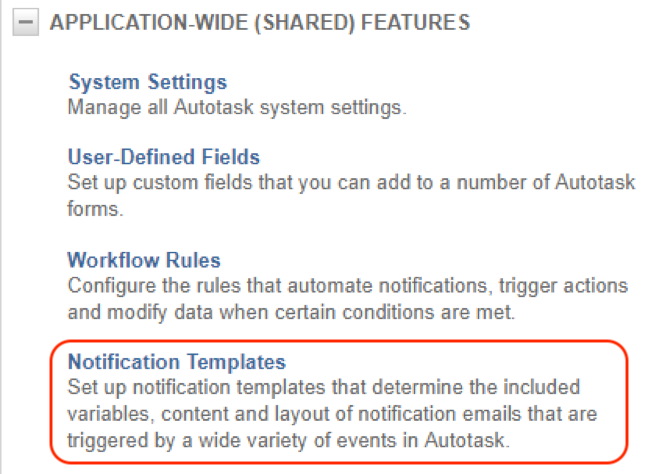
From the Admin screen, under ‘Features & Settings’, select ‘Application-Wide (shared) features‘:
You now have two main options for where to embed the survey:
- In a Notification Template (e.g. in the closing ticket notification)
- In a Survey Email Message
1) Method 1 - Notification Template
Select the ‘Notification Templates‘ option:
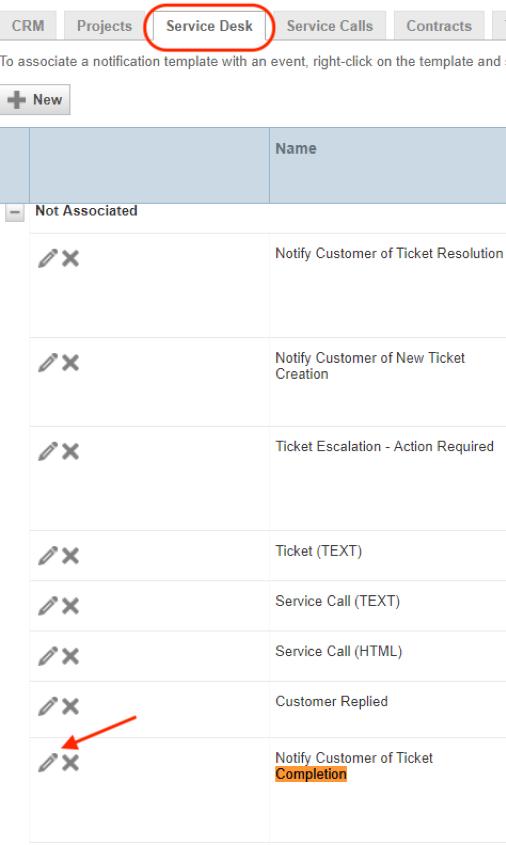
Select ‘Service Desk‘ and then click on the pencil icon to edit the relevant notification template:
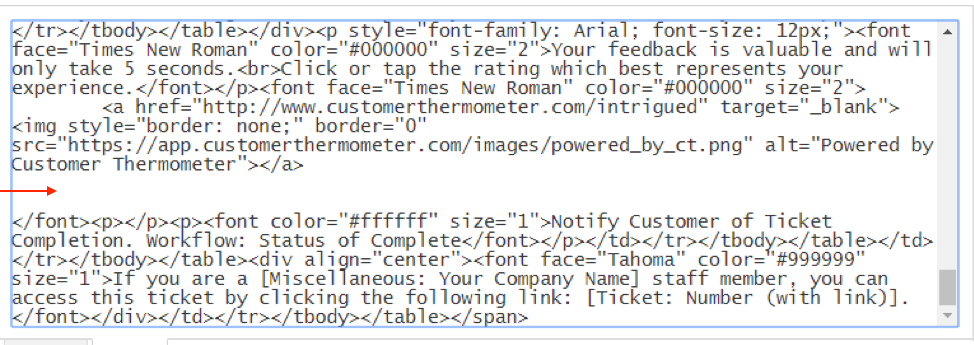
Select the ‘HTML’ tab:

It is important to select the ‘HTML’ tab, not the ‘Design’ tab.
Simply paste your Thermometer code into the chosen location within the email (e.g. at the bottom, to form part of the signature).
If you have lots of HTML code within the template already, you may find it useful to insert a line before and after the Thermometer code – then if you need to return to the template in the future you can easily see the Thermometer code within it:
Then save and close your template.
If you preview your Thermometer in the design tab after inserting, then it is expected that the icons may show as 'broken'. This is due to the AutoTask UI not loading external hosted images. This does not affect the display within the email template.

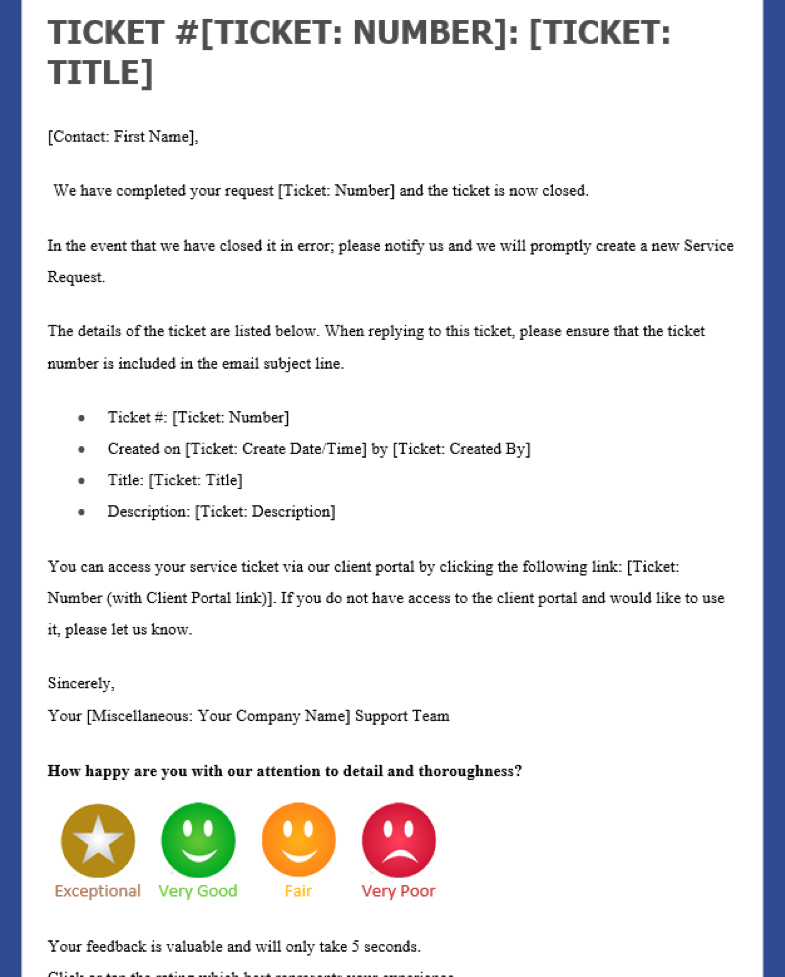
Below is an example notification email with the Thermometer added to the signature:
You will also need to add/edit your workflow rules accordingly – for assistance, please see our ‘Creating Workflow Rules‘ section below.
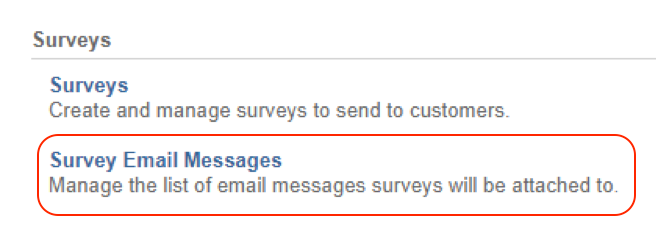
2) Method 2 - Survey Email Message
From the Admin screen, select ‘Features & Settings’ -> ‘Application-Wide (shared) features’ -> ‘Survey Email Messages‘:
At the top select, ‘New Survey Email Message‘:

From here, you will need to name your survey, give it description and enter an email subject.
You will need to ensure that the ‘Email Format’ is set to ‘HTML or Text‘, then select the HTML tab and paste in your Thermometer code:
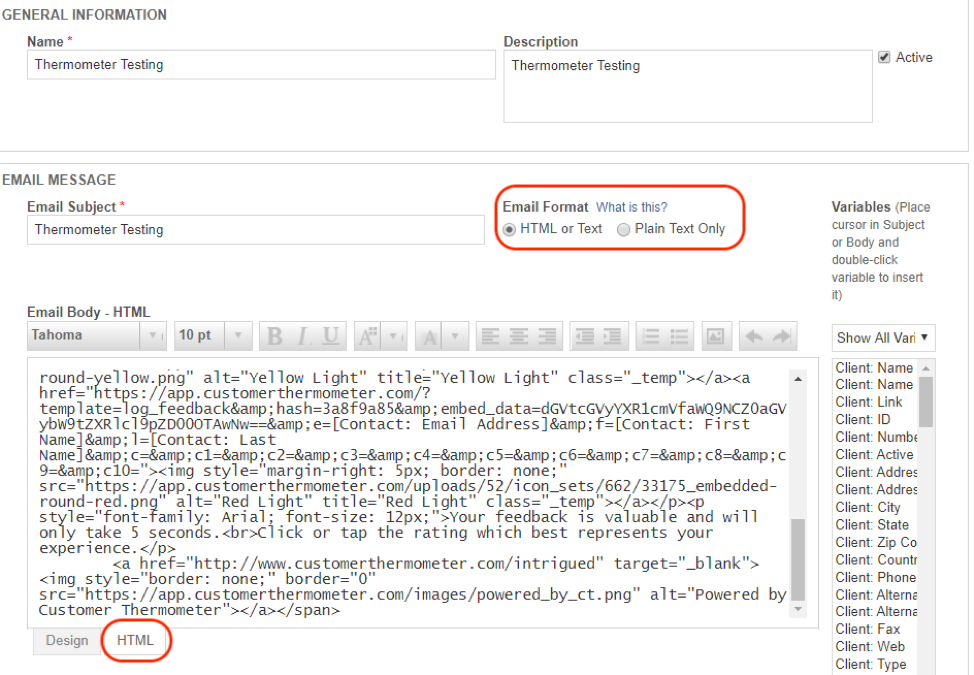
If you need to find additional variables, they are in this area of Autotask, on the right-hand side.
You can then switch back to the design tab to view your Thermometer and to customise the rest of the email content as necessary. Please note the icons do not display automatically when viewed on the Design tab.
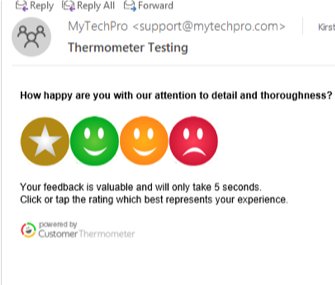
Below is an example survey email message containing a Thermometer. The email is sent out after the Ticket Completion Notification and does not list any ticket information:
You will also need to add/edit your workflow rules accordingly – for assistance, please see our ‘Creating Workflow Rules‘ section below.
Then you’ll need to create a survey by going to Admin > Features and Settings > Application-wide (shared) features > Surveys > + New Survey.
Then please add a name and display name (customers can see this) and then from the ‘Email Message (required if you want this survey to be sent when its conditions are met)’ drop-down select the name of the survey email message you just created.
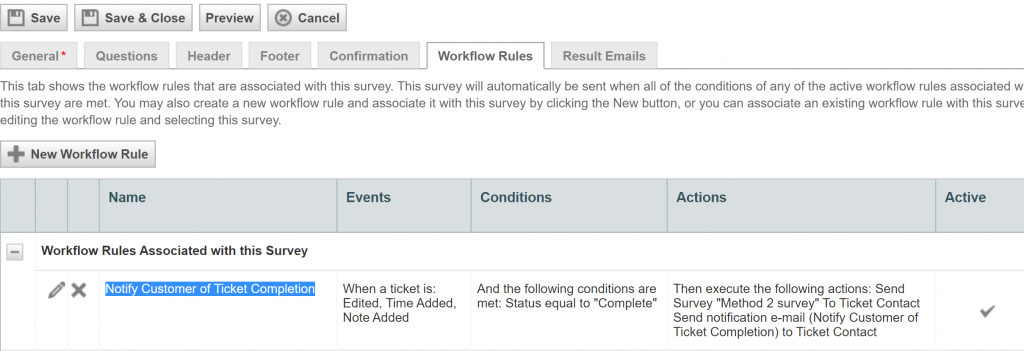
Now click on the Workflow Rules tab > Click the pencil to edit the ‘Notify Customer Ticket Completion’ workflow.
You can now scroll down to the section ‘The key features to select are:‘ below and follow to complete this section.
Creating Workflow Rules
For either method to operate properly, you must create Workflow Rules.
Scroll over the Autotask Icon, scroll over Admin then click on ‘Workflow Rules‘:
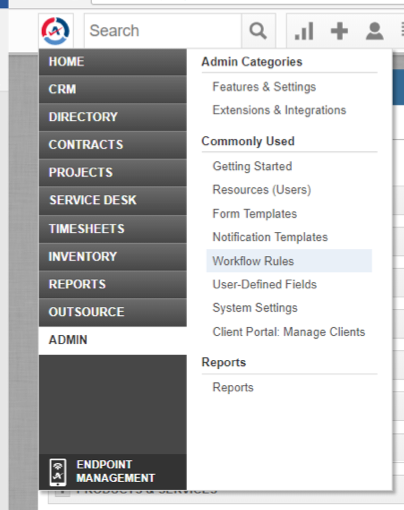
From the top Tab menu, select ‘Service Desk‘.
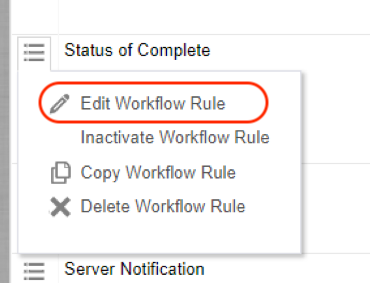
If you already have a Workflow controlling the email containing the survey, go to that Workflow and select ‘Edit Workflow Rule‘:
If you don’t already have a Workflow, you will need to create a new one (found at the top of the screen). Autotask should be able to assist with setting this up.
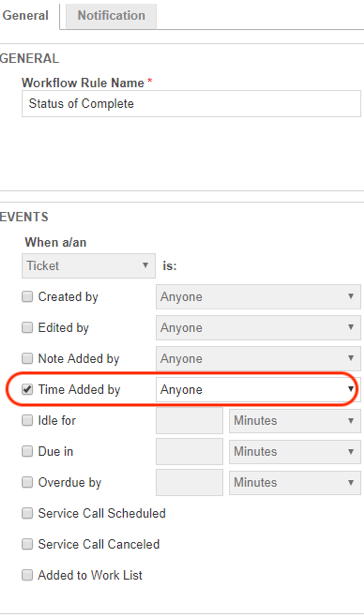
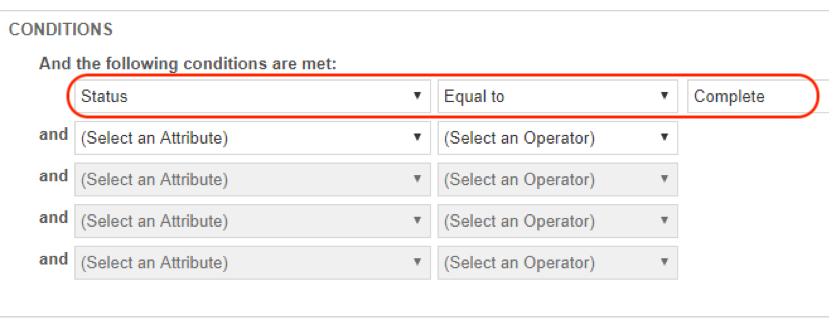
The key features to select are:
‘Time Added by’ = Anyone
‘Status’ Equal to ‘Complete’
Actions = ‘Then send survey to ticket contact’ *
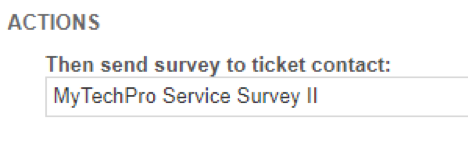
* The ‘Actions‘ element is only needed for Survey Email Messages (Method 2). If you have embedded the survey in a Notification Template (as per Method 1) then this is not needed.
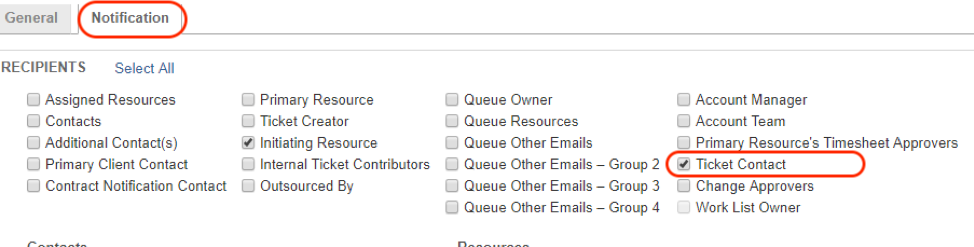
Lastly, go to the Notification tab on the Workflow Rule to ensure that it’s being sent to the Ticket Contact. (Other options for additional contacts are available)
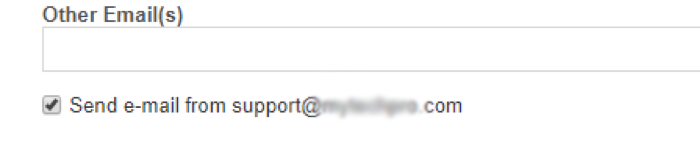
On the same page, scroll down and ensure that the Notification is being sent from a Support or other relevant email address.
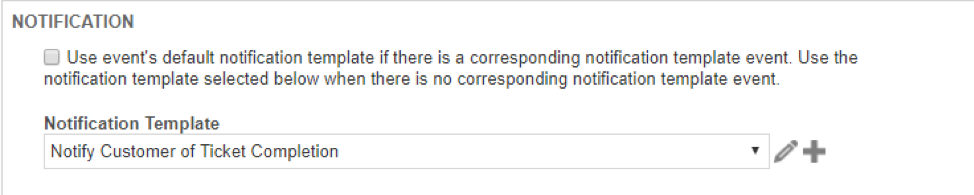
Under ‘Notification’, ensure that the Notification Template is selected (referring to Method 1).
Select Save and Close.
Note: if there is a contact that wishes to Opt-Out of Surveys, that should already be checked within Autotask under that contact’s information, and the Workflow will not send the survey email message to that contact.
Our thanks go to MyTechPro for kindly assisting with screenshots and examples for these instructions.
