Our Office 365 Outlook Add-In enables you to add a survey directly into your Outlook signature quickly and easily. What’s more, the recipient and sender details will be automatically captured and displayed next to the responses in your reporting – so your survey data will be fully identifiable.
Before authorizing the CT add-in within Outlook, please ensure that you have an Outlook 365 Thermometer set up within your Customer Thermometer account.
If you require a full administrative roll-out of the add-in to all users from the O365 portal, click here. However, firstly please ensure that you have created a Thermometer within the Customer Thermometer app.
Create your Thermometer
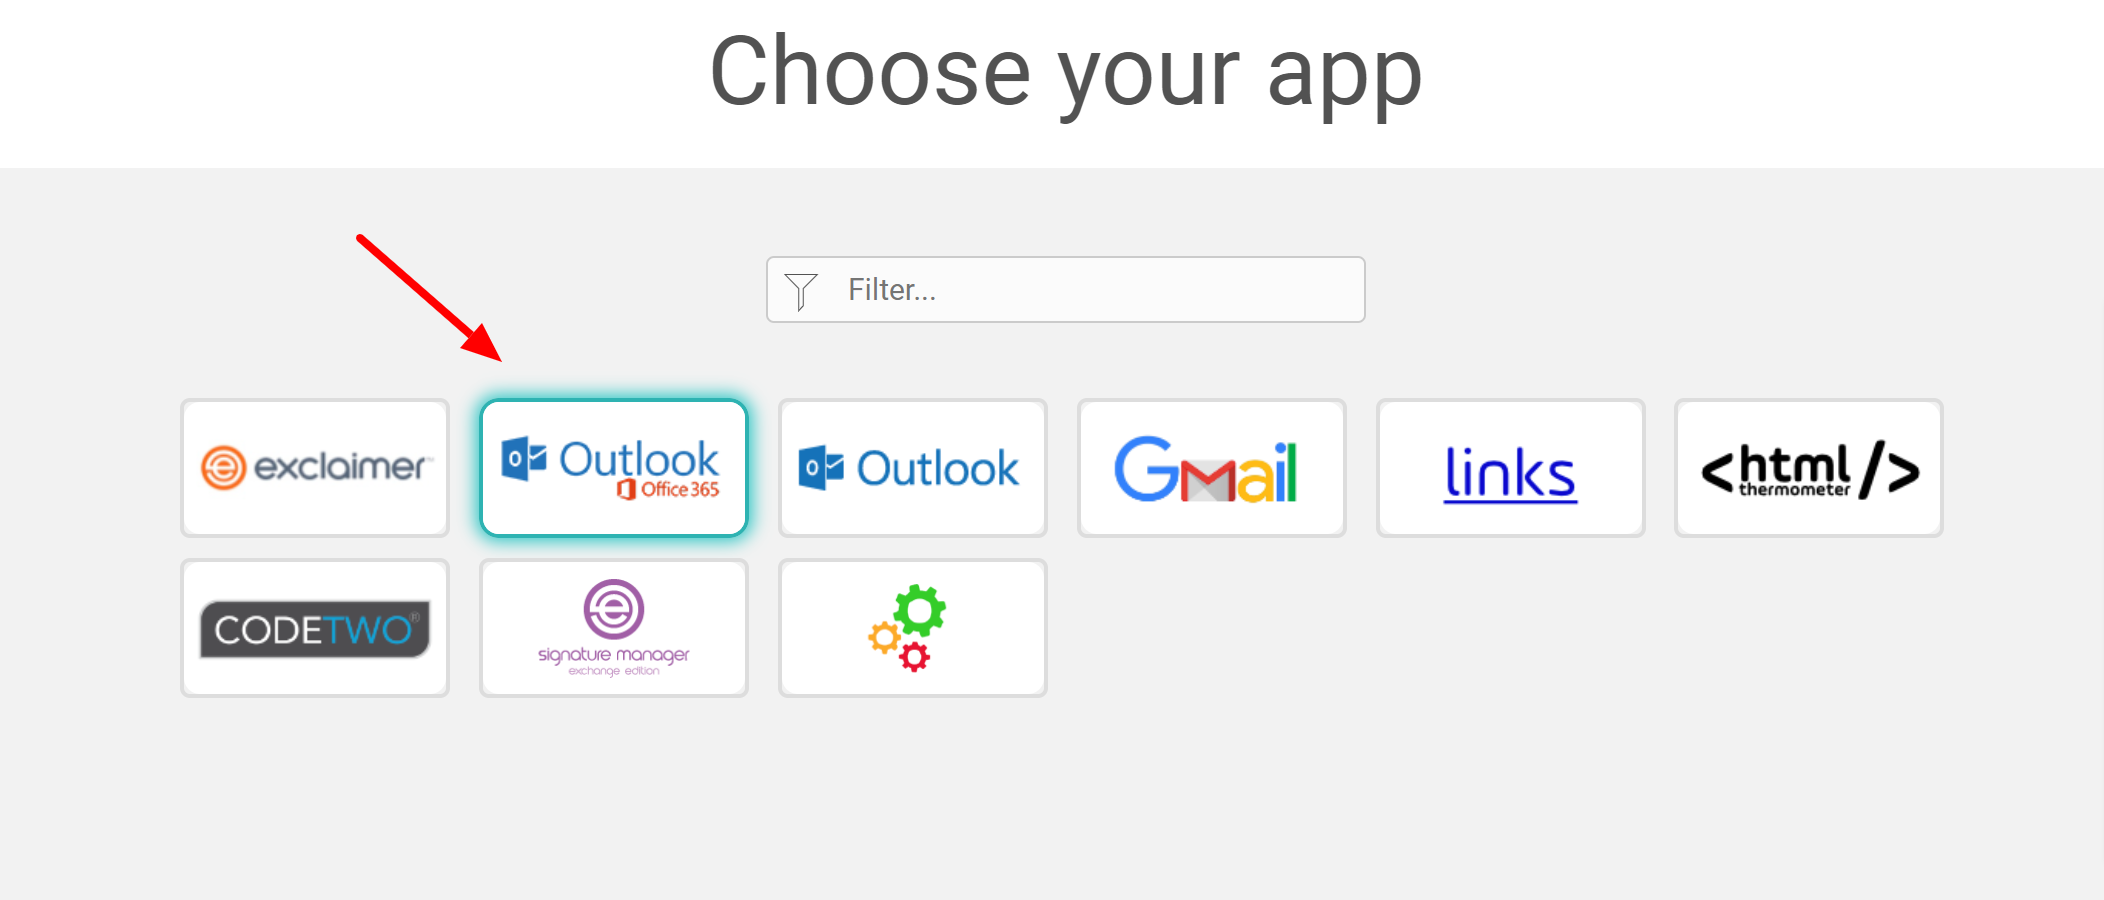
Once logged in to Customer Thermometer head to Thermometers > Add new Thermometer > Signature > Select Outlook O365
This will then open up your Thermometer Builder where you can create your survey and thank you pages.
The Question
This section of the builder is where you can choose the design of your survey including naming your Thermometer, adding your question and selecting your survey icons or uploading your own bespoke icons. The below video will demo all the customization which can be achieved in this section.
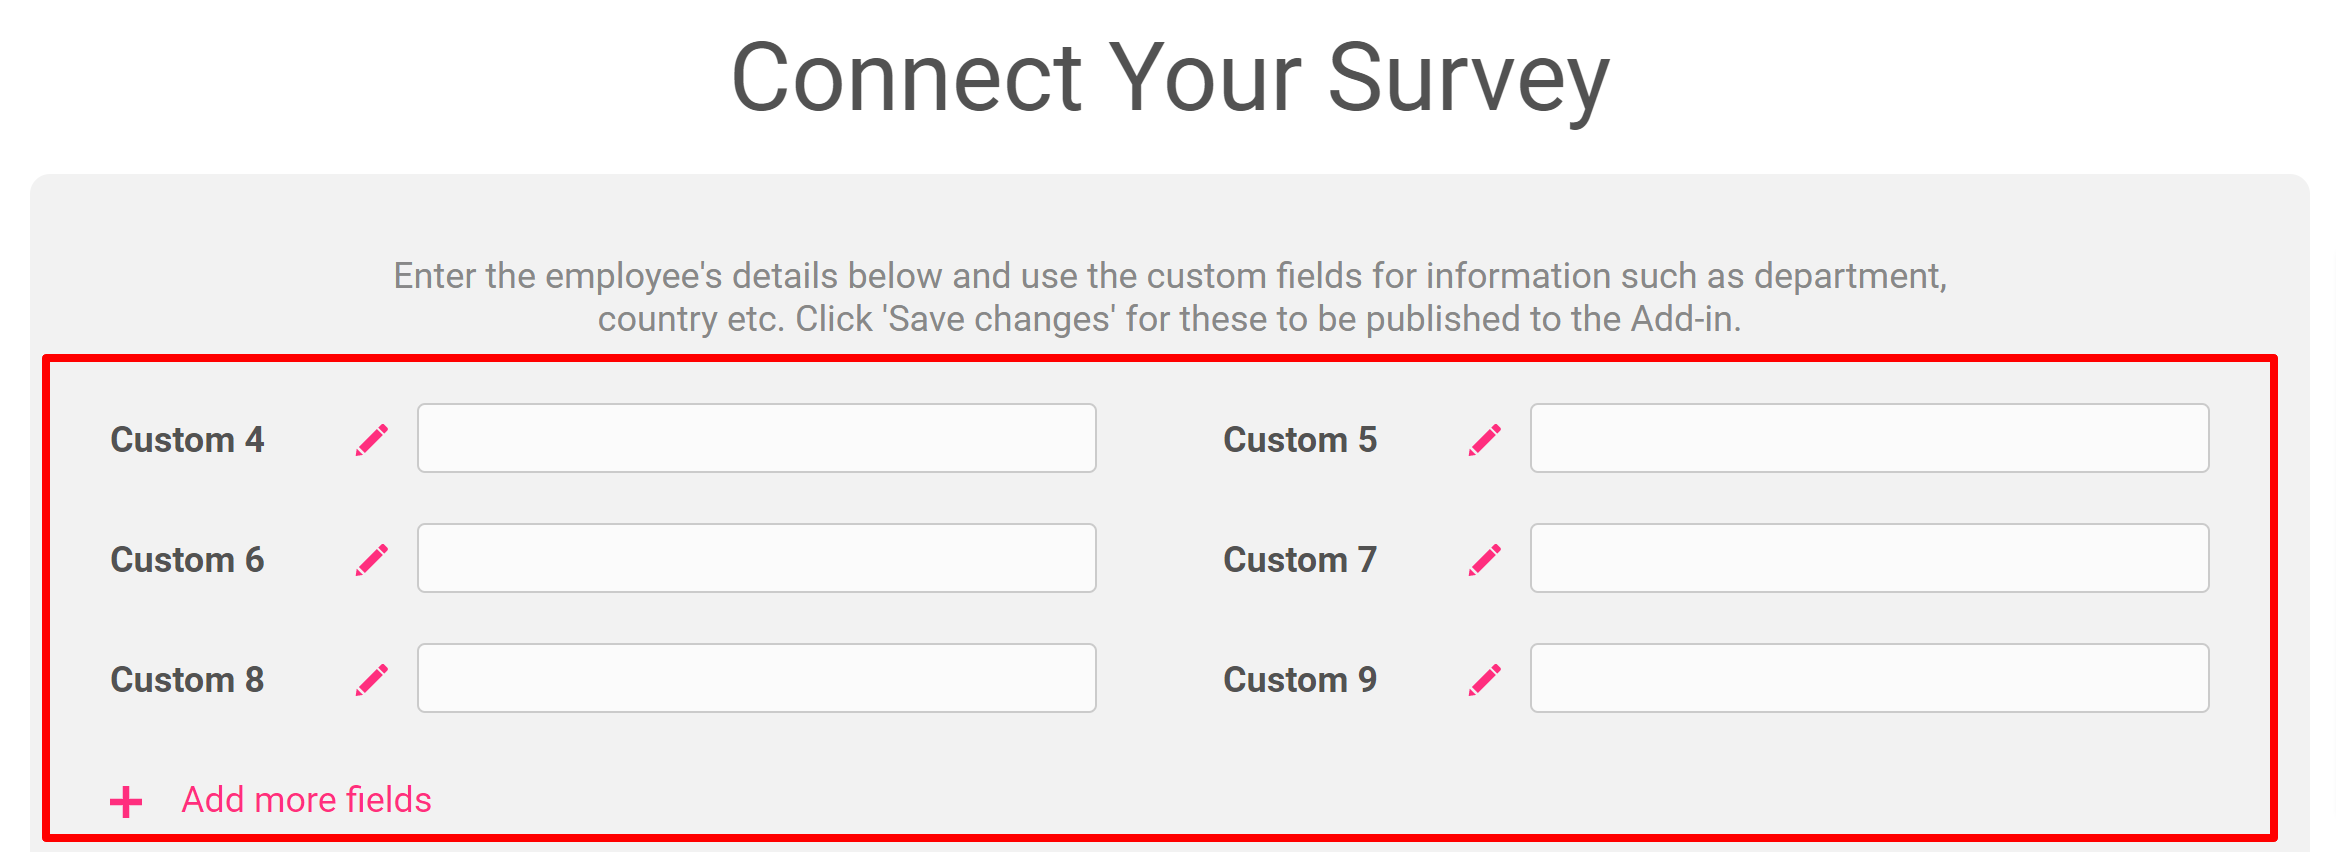
Connect your survey
With our Office 365 Outlook Add-In, the recipient and sender details will be captured alongside all responses automatically. If you'd like to hard code any additional details to display next to your responses you can do so in the fields below:
Response options
In your Connect your survey area, you have additional response options. Here you can choose whether to enable a lockout and set your email alert notifications.
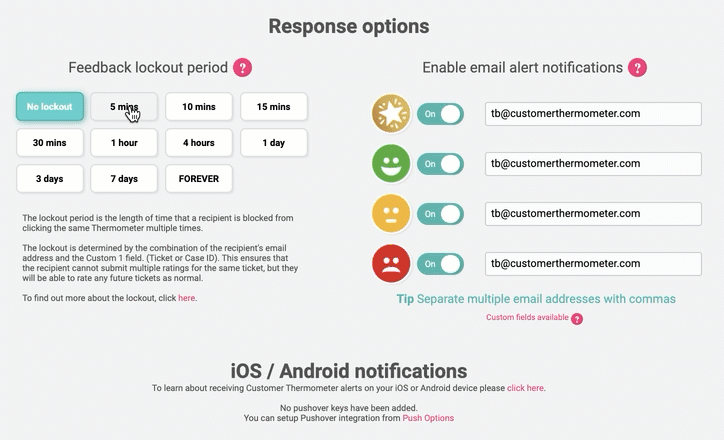
Separate multiple email addresses with commas.
Thank you page
It’s time to get those Thank you pages looking beautiful!
See below for a step by step walkthrough:
Embedding your survey into Outlook 365
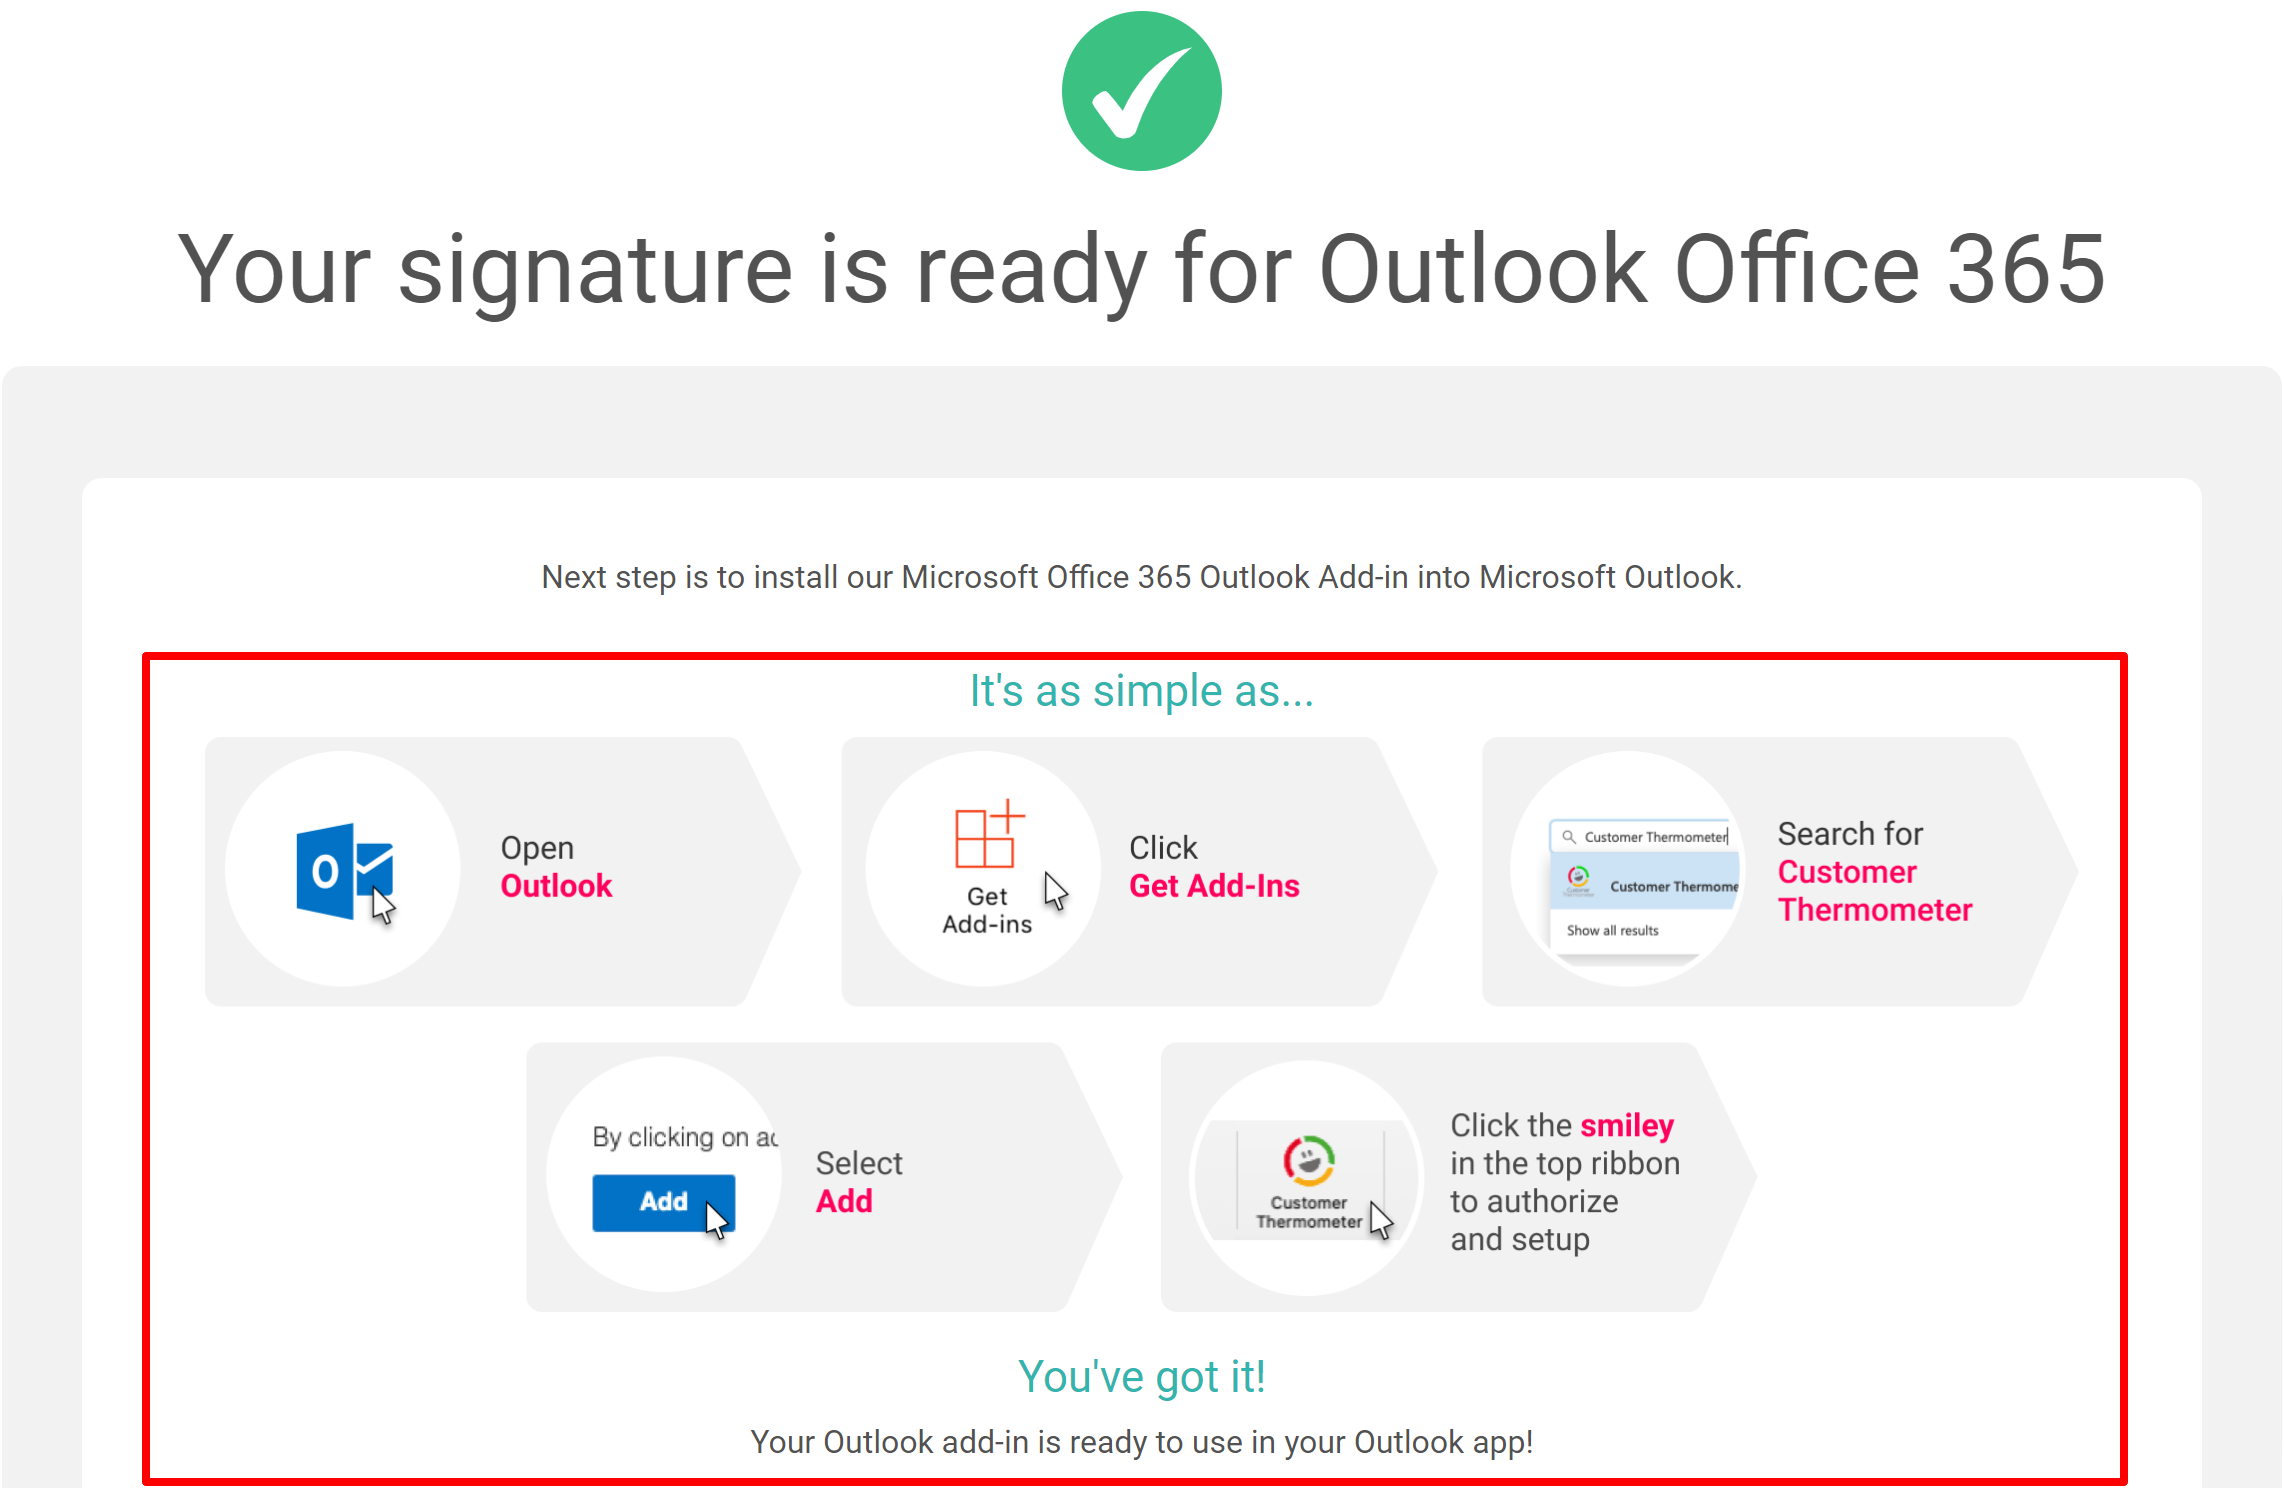
Once you've finished designing your Thermometer, the 'Give me my Thermometer' section will provide you with your instructions to download the add-in within your O365 account. The add-in is how you will embed your survey into your emails.
Please note, if you do not have a 'Get Add-Ins' button available it's most likely due to your O365 permissions. You may need to ask your IT admin (or person who manages your emails), to enable this for you.
Authorize your add-in
Next, you’ll need to authorize your Customer Thermometer account and your Office 365 Outlook account to work together:
- Return to your Outlook inbox and click the Customer Thermometer logo in the top ribbon.

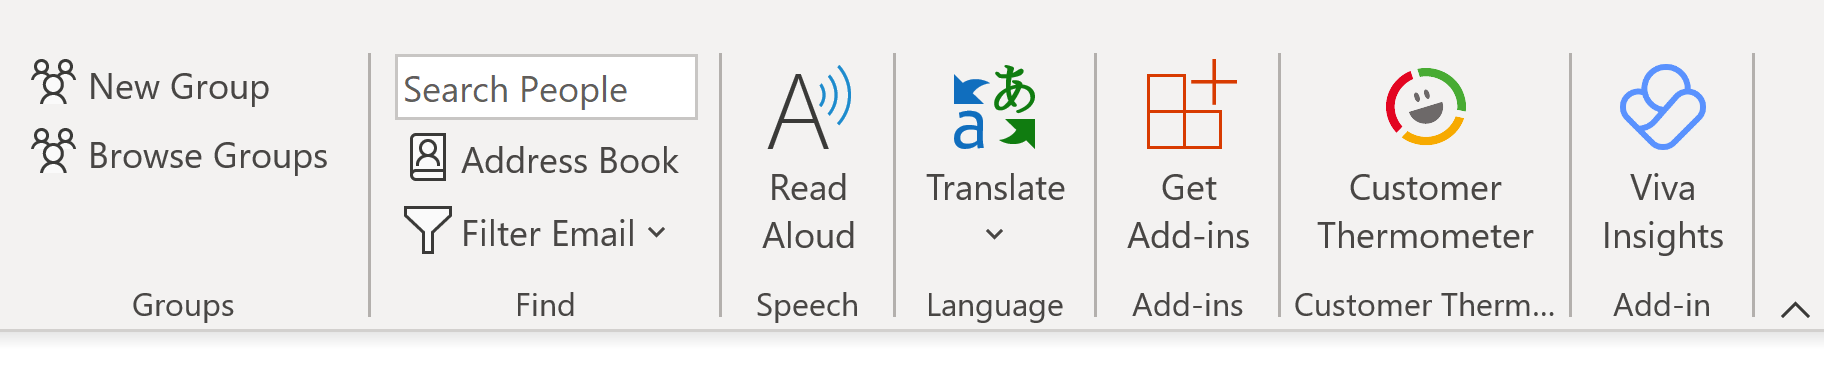
- A panel will launch on the right of your Outlook inbox – click ‘Authorize‘.

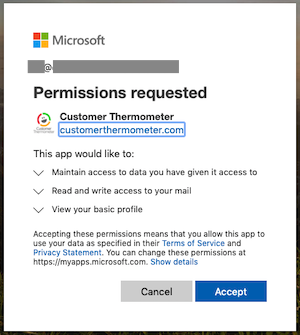
- Enter your Office 365 Outlook login credentials when prompted.
- Click ‘Accept’ in the permissions pop-up:
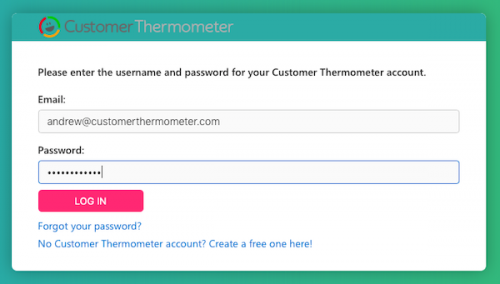
- Enter the login credentials for your Customer Thermometer account and click ‘Log in’:
Your Customer Thermometer account is now connected to your Outlook account!
Please note if rolling out the add-in across a team, each person will either need to be given the Customer Thermometer credentials for this part of the set-up or the main admin will need to log in to Customer Thermometer within the add-in on each person’s device.
Signature set-up
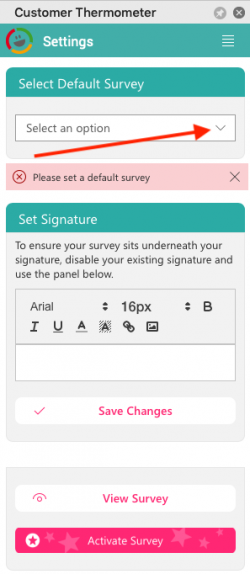
Finally, you’ll need to select your Thermometer from the drop-down in the side panel:
Only ‘Outlook Office 365’ Thermometers will be available for selection in this dropdown.
Click ‘Activate Survey’.
Survey positioning
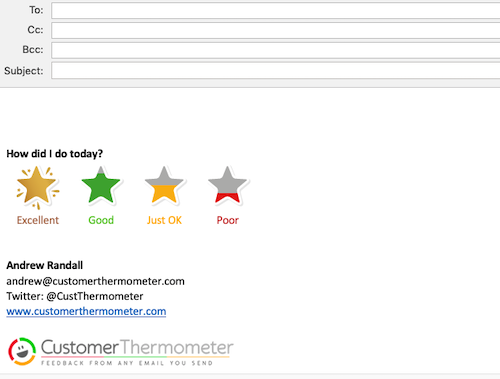
If you already have an Outlook signature, your survey will automatically be placed above your existing signature:
However, if you’d prefer your survey to be positioned below your signature, you can use our signature management panel within the add-in to achieve this.
Simply disable your existing Outlook signature, and recreate it in the side panel instead:
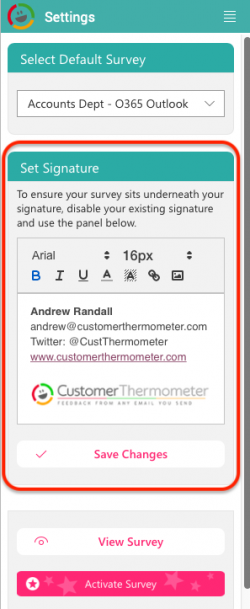
Click ‘Save changes’ and then ‘Activate Survey’.
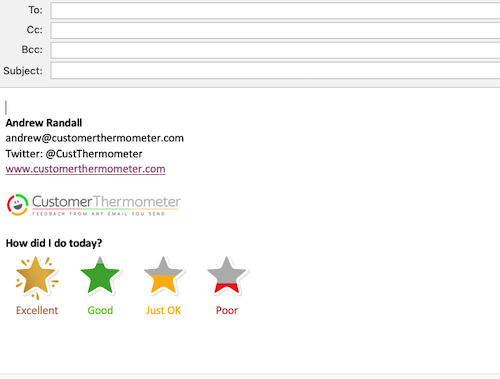
Your survey will then appear below your new signature:
Sending emails containing the survey
Sending an email containing your survey is quick and easy and there are a few ways you can do it.
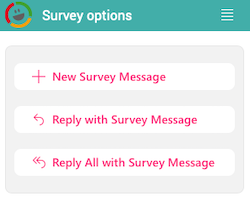
When creating a new email you can use the pink 'Insert Now' button from the side panel to simply add your survey to your mail.

Or if you are replying to an email you can select your preferred option in the side panel:
Please note the survey can only capture the correct identifiable data if the survey is manually added to the mail using either method above. The survey cannot be automatically added to the email nor can you copy and paste another colleague's survey into your email.
You must apply the survey by using the methods given above or you will run the risk of capturing non-identifiable or incorrect data.
Supported versions
Please ensure your Outlook is updated to the latest version. The add-in may not fully function on Outlook 2002, Outlook 2003, Outlook 2007, Outlook 2010, Outlook 2013.
Due to a limitation of the Microsoft APIs, identifiable data will not be captured when sending a survey from a shared mailbox.
Need a hand?
We also have a video demo below which runs through how to install the add-in and apply your signature survey.
All feedback responses will generate identifiable feedback ratings and be stored inside your account.
