Once logged in to Customer Thermometer head to Thermometers > Add new Thermometer > Marketing > Select Sirportly
This will then open up your Thermometer Builder where you can create your survey and thank you pages.
The Question
This section of the builder is where you can choose the design of your survey including naming your Thermometer, adding your question and selecting your survey icons or uploading your own bespoke icons. The below video will demo all the customization which can be achieved in this section.
Connect your survey
In order for identifiable data about your recipients and senders to display within your reporting area, you first need to capture it. This would be done at the point that the email is sent, by including merge fields/variables from Sirportly within the Thermometer code.
The most common Sirportly variables are shown below for you, however, you can add more if you wish.
These variables will capture the corresponding pieces of identifiable data from Sirportly and present them alongside the recipient's feedback rating within your reporting.
Response options
In your Connect your survey area, you have additional response options. Here you can choose whether to enable a lockout and set your email alert notifications.

Separate multiple email addresses with commas.
Thank you page
It’s time to get those Thank you pages looking beautiful!
See below for a step by step walkthrough:
Embedding your survey into Sirportly
Once you've finished designing your Thermometer, the 'Give me my Thermometer' section will provide you with your finished survey to embed into Sirportly. Click the 'Copy to clipboard' button to copy your survey HTML to embed into Sirportly.
This option will allow Sirportly to send Thermometers as part of a macro.
Head to the Admin area and go to “General Settings” > “Integration Options”.
Enable the checkbox, add your Thermometer embed code (from above)and a subject line:
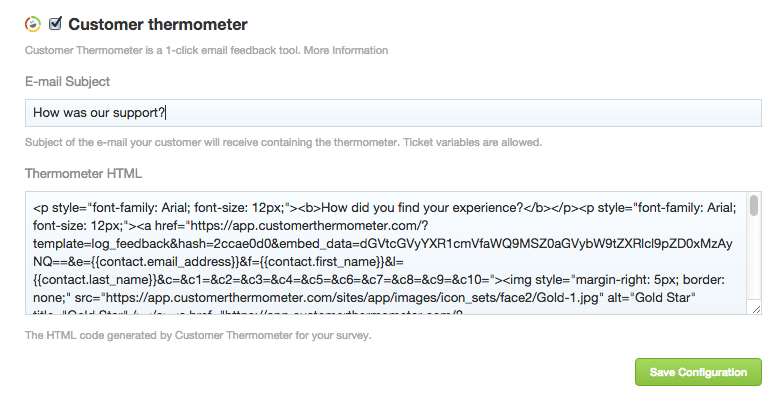
Click “Save Configuration”.
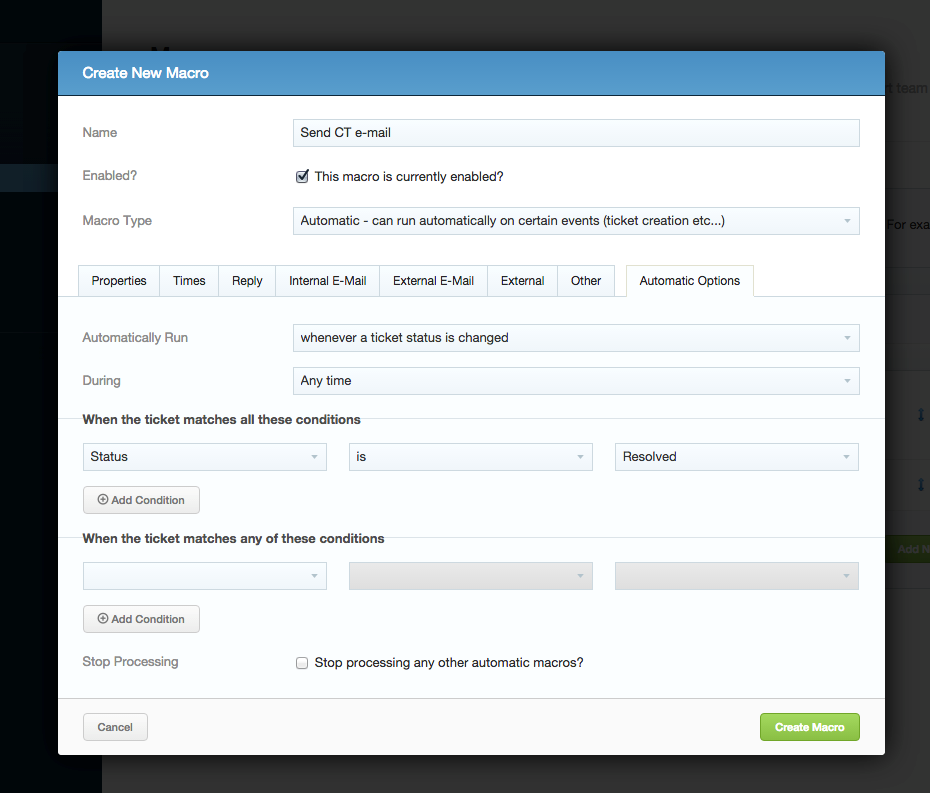
Head to Workflow > Macros. Here, you can configure macros to respond to events.
In this example, we’ll set one up to send a message when a ticket is set to “Completed”.
From the Automatic Macros tab select “New Macro“, and give your new macro a name.
Select “Automatic Options“; change “Automatically Run” to “whenever a ticket status is changed” and configure “When the ticket matches all of these conditions” to only find “Resolved” tickets:
Select the “Other” tab and from “Integration Actions” select “Send contact a Customer Thermometer e-mail”.
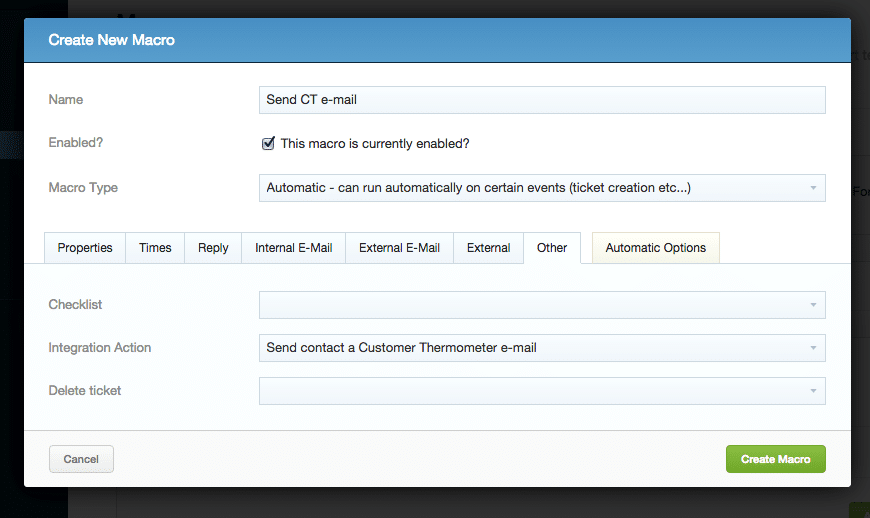
Save your new macro.
Adding Thermometer icons to Sirportly signatures
You can assign Thermometer signatures to each of your agents using the following process.
In the menu area, navigate to E-Mail Templates and create a new one:

Click the Footer HTML tab and paste the embed captured earlier:

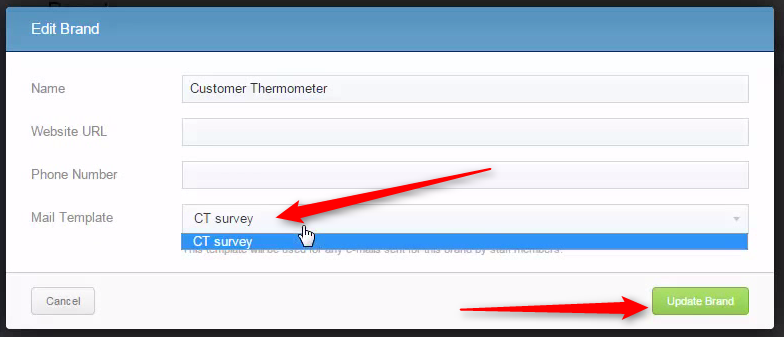
You then need to assign that template to a “Brand”. A Brand is your group of agents.
Navigate to Brands and click “Add new Brand”:

Select the correct Mail Template from the dropdown and click “Update Brand”: