Custom fields
Custom fields are an optional feature within Customer Thermometer but we certainly suggest you use them to receive identifiable feedback.
Within your 3rd party system, you may have variables or merge fields that represent pieces of data such as recipient email address, first and last name, ticket ID or agent name. You can use these within your emails or templates to pull in the relevant, personalized data for that email or ticket.
In the same way that you use these merge fields or variables to personalise emails within your system, you can use them within the Customer Thermometer to produce personalized surveys for recipients and also receive identifiable feedback.
Alternatively, you might use them to personalize a Thank you page for a recipient when using Email or Embedded Thermometers.
Up to 10 custom fields are available. Note that in the majority of the main reporting screens – only three are displayed. League Tables and exports will show all 10 fields if you are using them.
Ways you could use custom fields
Using custom fields to collect identifiable data for Embedded Thermometers
Using custom fields to collect identifiable data for Email Thermometers
Personalising the survey
Once you’ve started collecting your identifiable data you can use this to your advantage to personalise the survey itself and your Thank You pages.

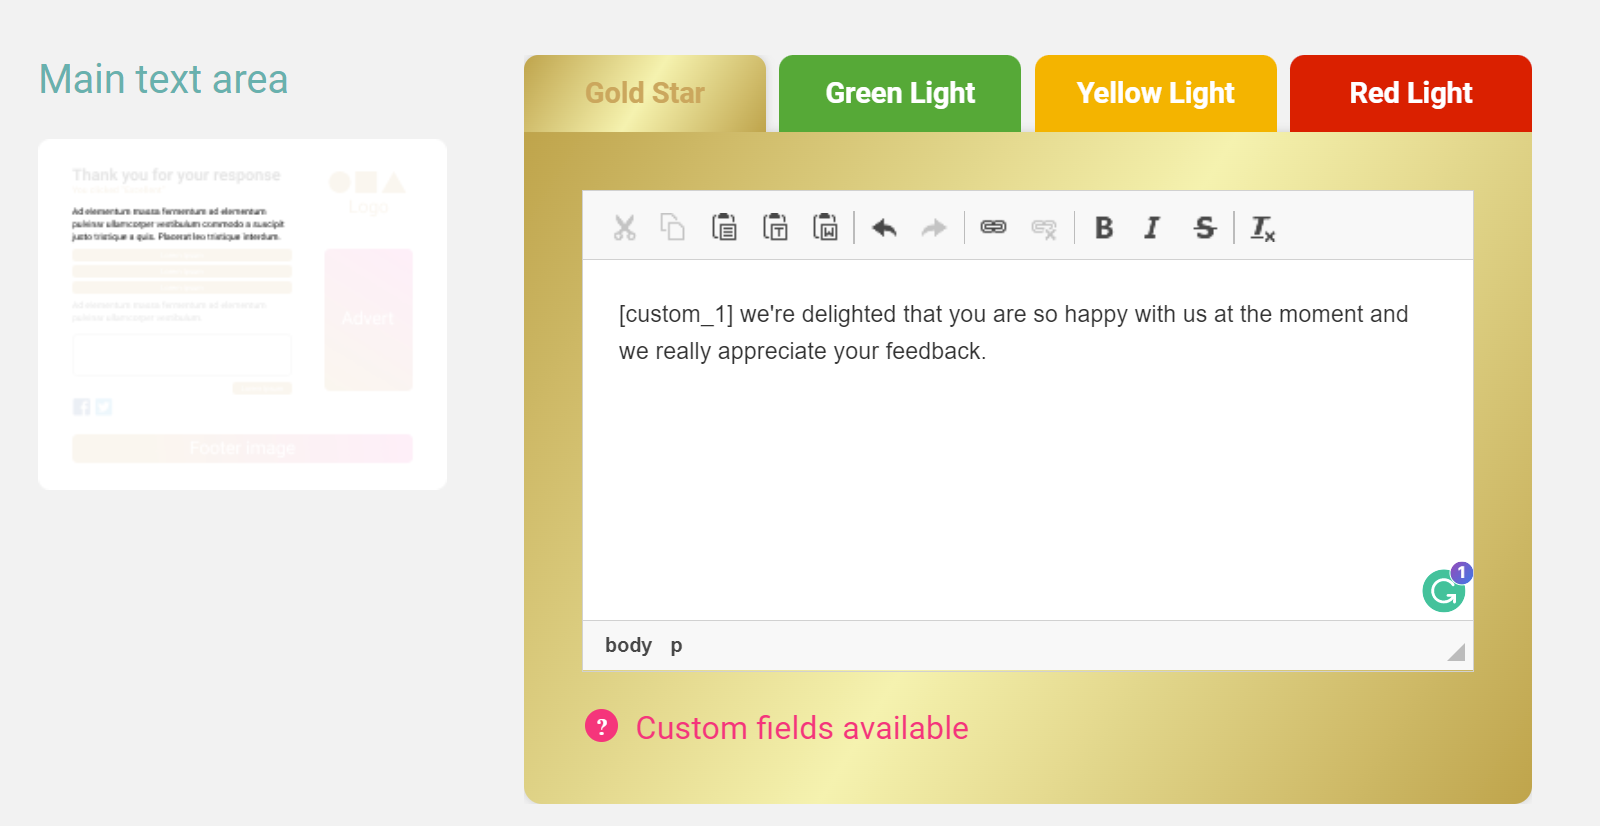
For example, if you were collecting the recipient's name in custom 1, by adding the custom 1 variable into the body of text on the Thank you page this will pull through the recipient's name.
To include personalisation such as including your account manager’s names in the temperature ratings you can add the custom field name that the relevant data is collected in within the descriptions themselves.
Re-naming Custom Fields in the Reporting and Alerts
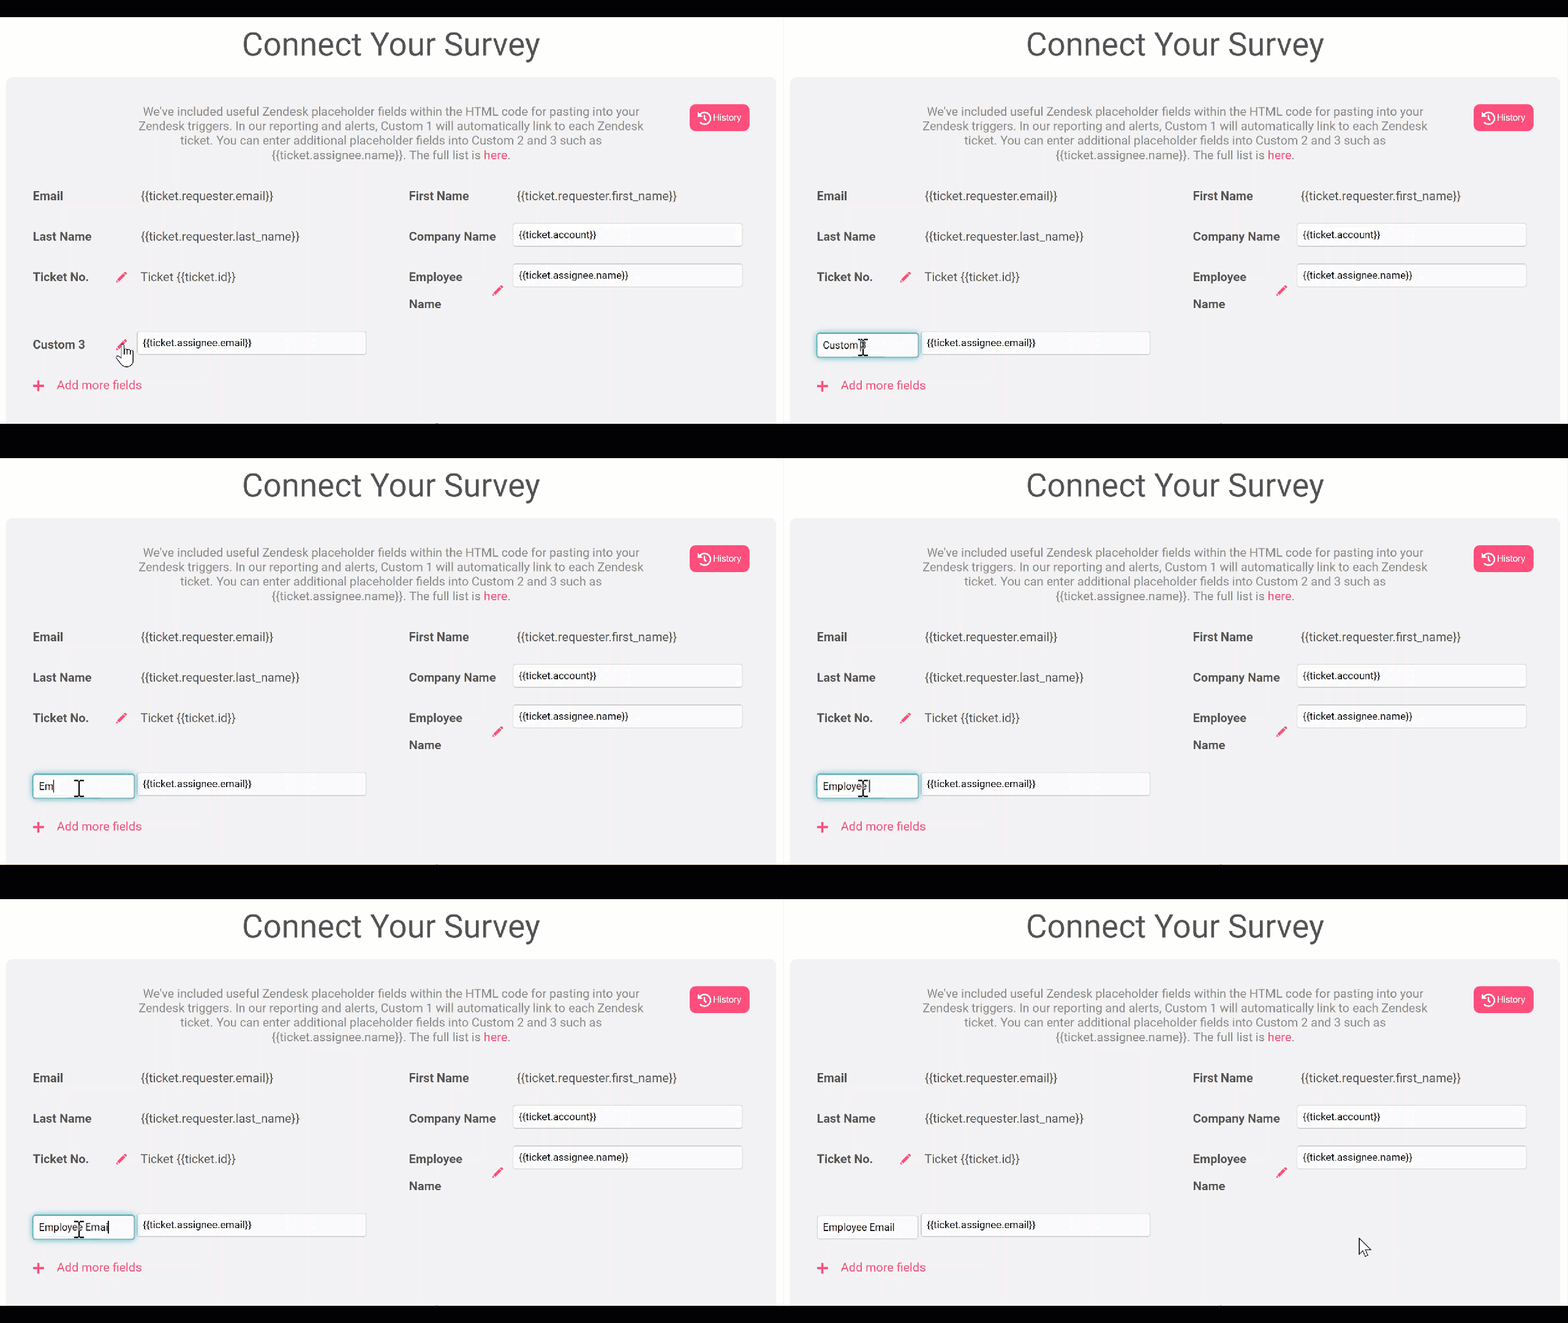
You may for example when an email alert is received want custom 1 which holds the agent name to read as Agent: Lily Bloggs instead of Custom 1 : Lily Bloggs.
You have two options for how you can to re-name the custom fields for both alert emails and reporting:
1. Per Thermometer
Go to Thermometers > select your Thermometer to open your Thermometer Builder > Connect your survey section. Where there's a small pink pencil next to the custom field you can change the label.

If there's not a pink pencil it's due to the custom field being locked down on purpose by Customer Thermometer.
2. Account-wide
This option is only useful if you have multiple Thermometers and all are capturing the same data within the same custom fields.
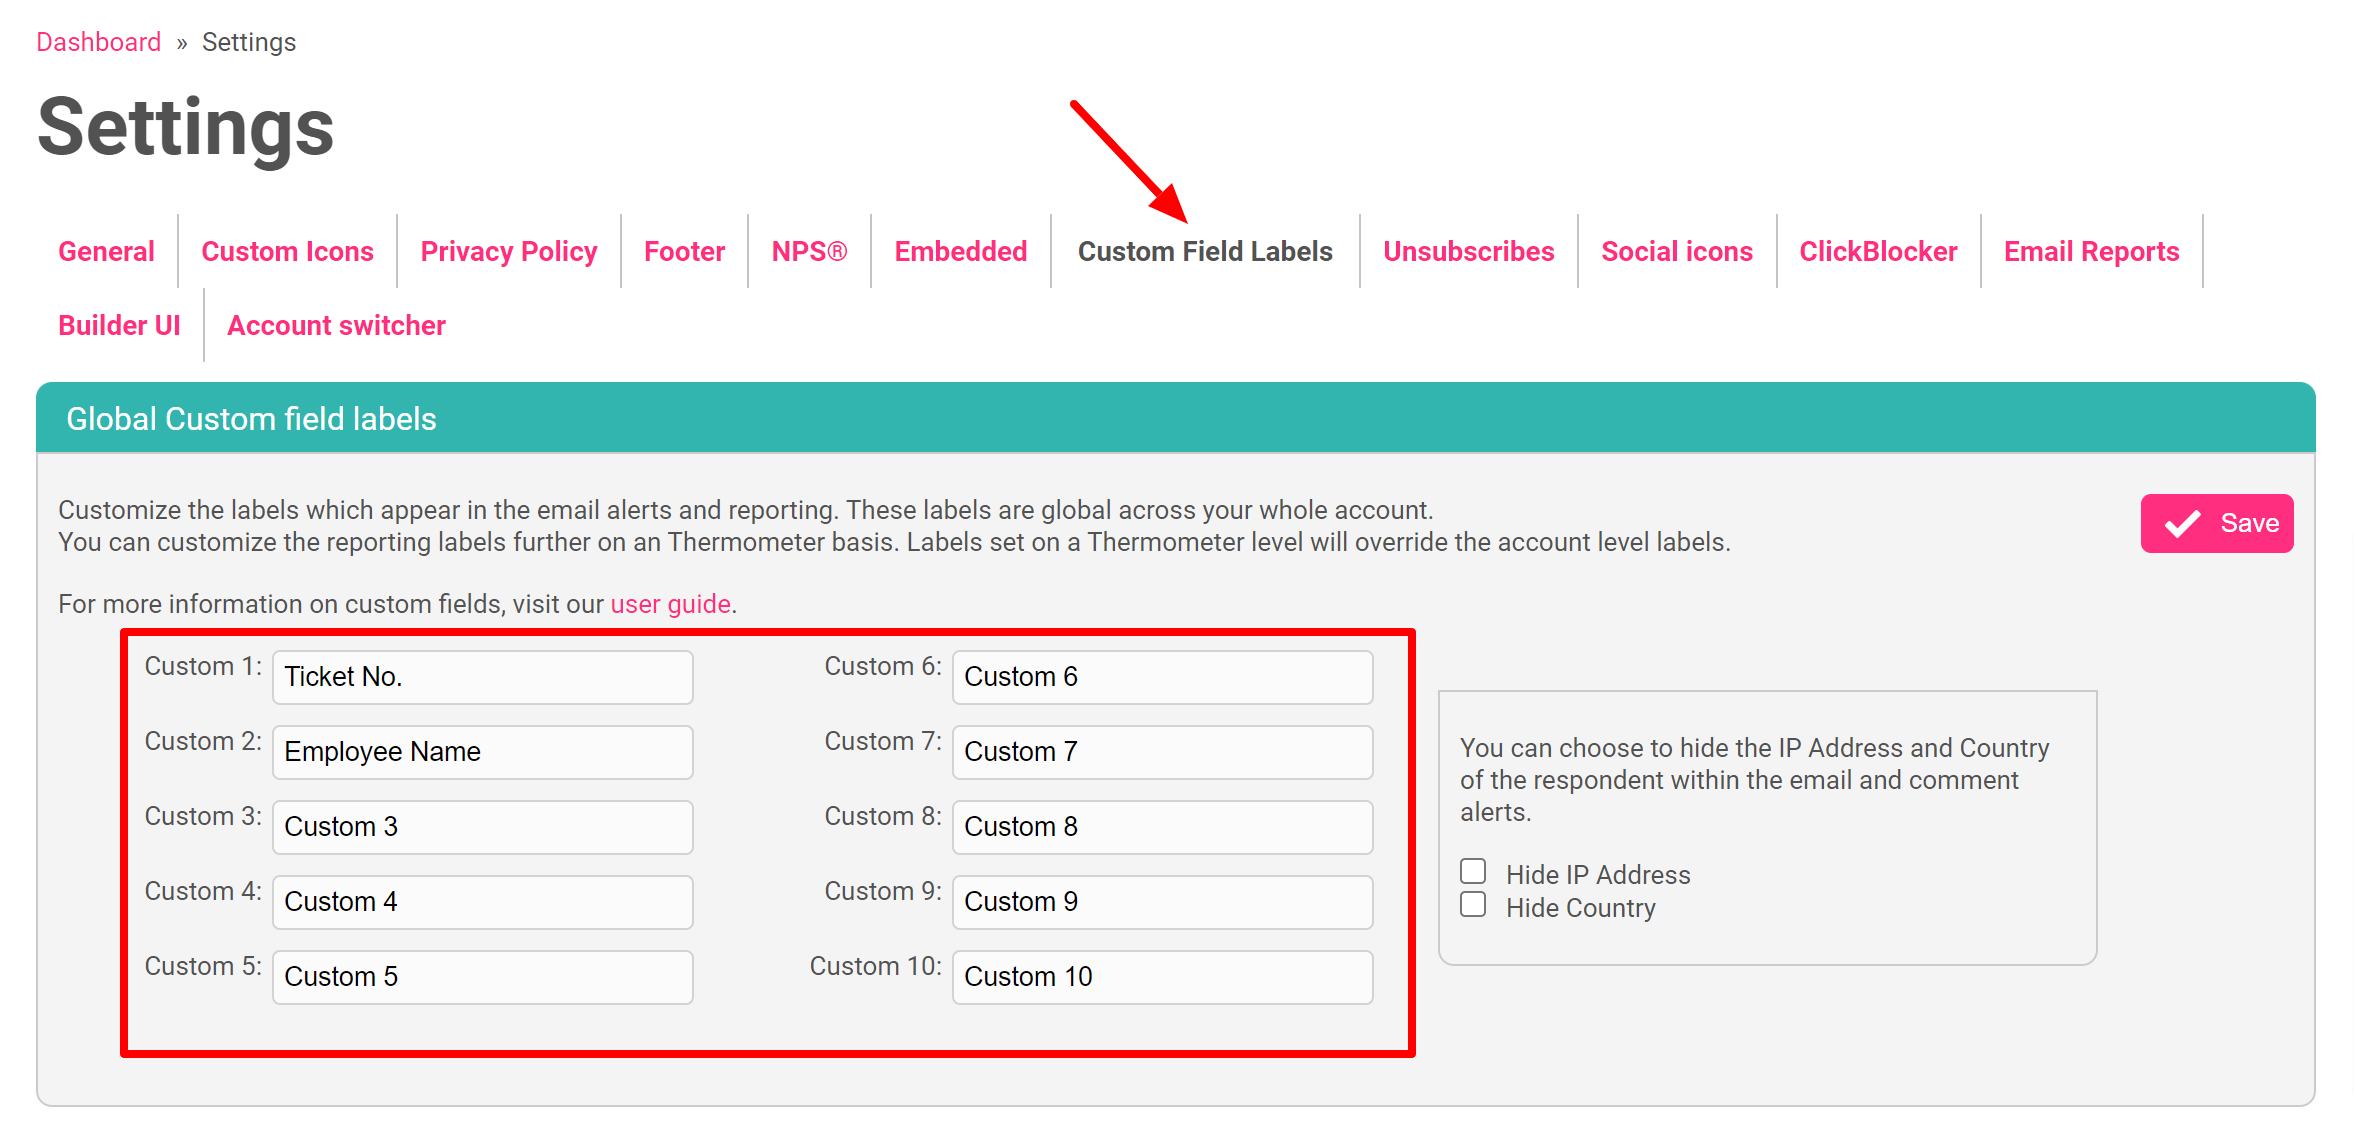
Go to your drop down in the top right drop-down > Settings > Custom field labels.

The custom labels you type into this area will be replicated across all your Thermometers.
You also have the option to set custom field labels by Thermometer underneath this section too:

Click save when you’re done. The fields will be updated immediately and can be changed at any time.