Microsoft Power BI
We have developed a custom connector for Microsoft Power BI to pull responses straight into Power BI Desktop. Download the Power BI connector from: https://www.customerthermometer.com/powerbi/CustomerThermometer.mez
Move CustomerThermometer.mez file into:
Documents\Power BI Desktop\Custom Connectors\
The file must exist in that exact directory structure. If any of these folders don’t’ exist, you should create any of the missing folders.
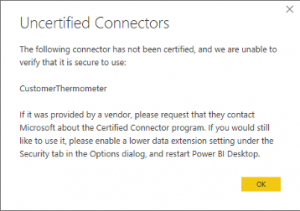
When you open the Power BI Desktop application, it may show an error message (as shown below), regarding Uncertified Connectors. If so, please Enable the uncertified connector using the following instructions:
File -> Options and Setting -> Options -> Under Security tab, select the option
Allow any extension to load without validation or warning
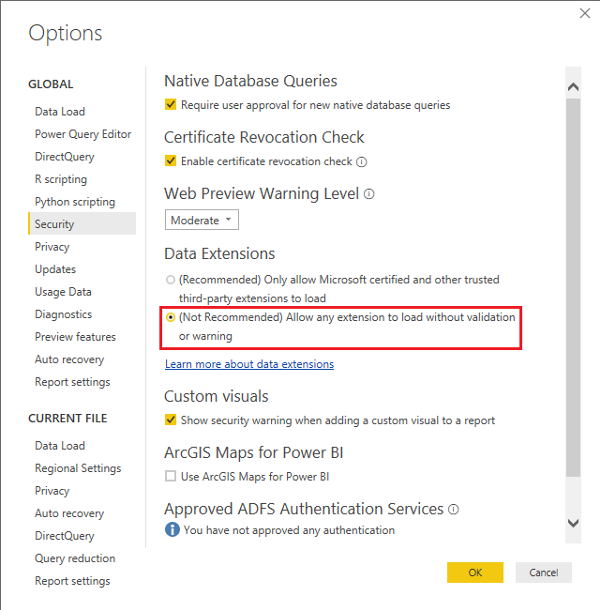
Then restart Power BI Desktop.
Set up Power BI
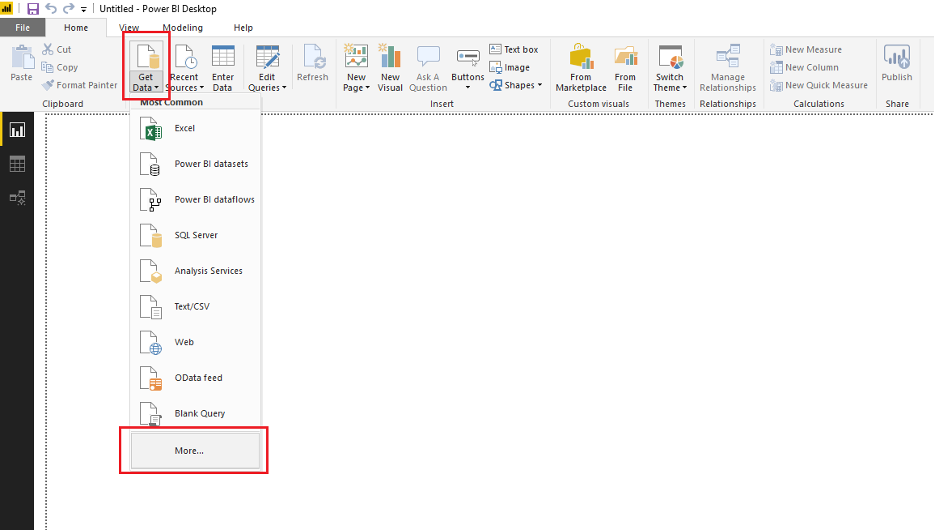
Open Power BI Desktop application and select Get Data then click on the more option
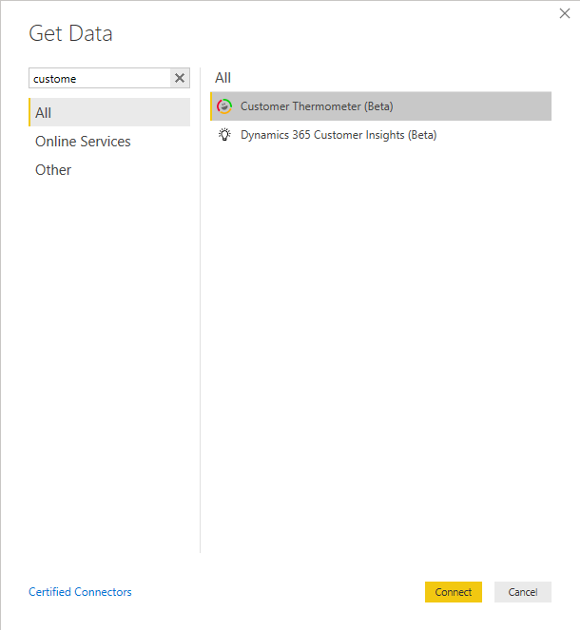
Enter the connector name and select the Customer Thermometer connector then click on the Connect button
Enter the API keys and Account names then click on the Ok button. You will find your API key in the Automations area. Go to the drop-down in the right-hand corner of your Customer Thermometer account, select Automations.
Click on the Load button for all details to be loaded into table
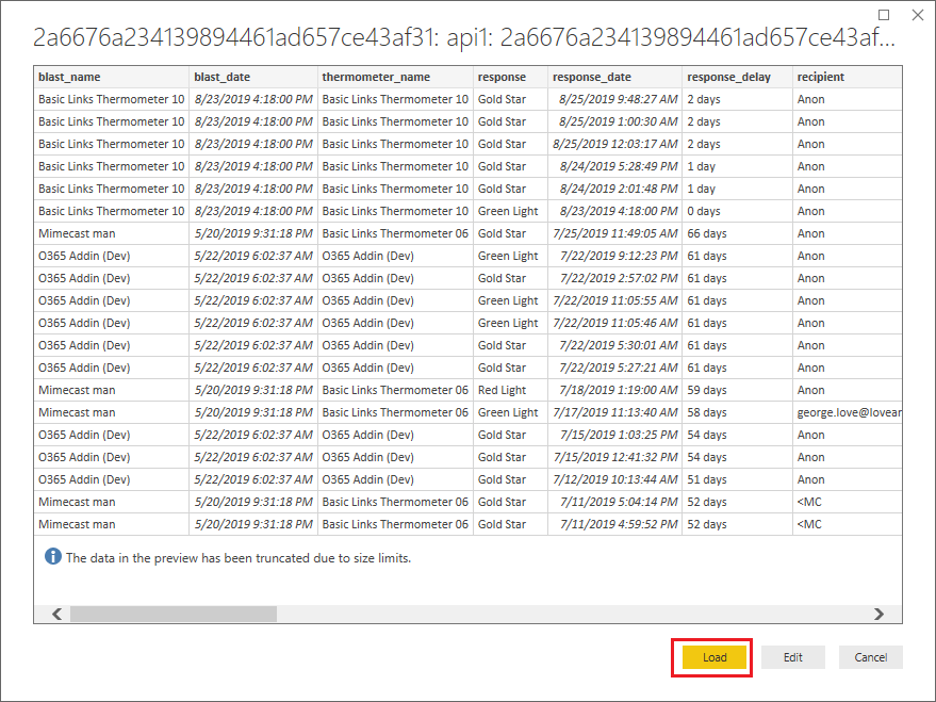
By default, the first 200 responses are pulled in but if you add a parameter to the API call, it can pull more responses through. For example, if you add &limit=100000 to the end of the URL this will pull through data to that limit.
Refresh
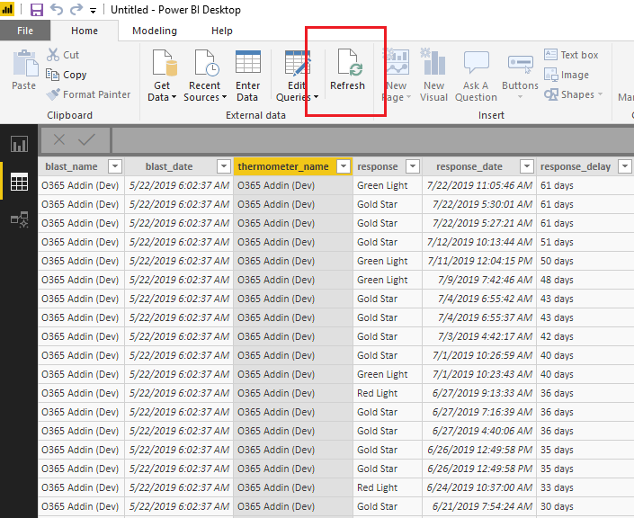
If you need to refresh the table details with the latest data, you can just click on the Refresh button from the ribbon within Power BI Desktop.
Setting up a scheduled data refresh
You can set up a scheduled data refresh of Customer Thermometer within your Power Bi by using the on-premise data gateway (personal mode) also known as the Power BI Personal Gateway.
Due to the limitation of support for the Connector & refreshing data sources, you will need to use the “Web” data source as your data-source.
1. From the top bar within PowerBi Desktop, go to Get Data -> Web
The URL needs to be in the format of: https://app.customerthermometer.com/api.php?apiKey=[API_KEY]&getMethod=getBlastResults&showNull=tru e
You will find your API key in your Customer Thermometer account, go to the drop-down in the top right-hand corner and select Automations.
https://app.customerthermometer.com/?template=endpoints
The API web URL call should look like the following:
https://app.customerthermometer.com/api.php?apiKey=90f6fff94a4627a02c5268ab&getMethod=getBlastResul ts&showNull=true
2. Keep Basic selected, paste your URL in and then click OK

3. Once the data source has been setup and any data transformations completed, the next step is to Publishing from Power Bi Desktop to Power Bi. This will sync using your Office 365 details.


4. Within the Workspace that you published the connector to, the new dataset should then be listed:

5. From the settings of this Dataset (navigating from the three dots on the dataset), you’ll be able to setup the Scheduled refresh.

Customer Thermometer recommends setting a daily refresh 30 minutes prior to the start of your day, so the Power Bi dashboards show the latest Customer Thermometer data.
You can set the scheduled refresh to reoccur a number of times throughout a day.
We recommend adding an email address to alert you if the refresh fails.
The authentication of the dataset must be set to Anonymous.
Saved
If you need to save the connector, click on the Save button and select the location. The file will be saved as a pbix format.
You can then double click on the .pbix file and it will open without having to setup the data connection to Customer Thermometer again.